Updating a Headless Environment
This guide covers how to update various aspects of your headless environment, including environment settings, build configurations, and deployment parameters.
What can be updated?
Section titled “What can be updated?”Once a Headless environment is created and it has completed its first build you can still choose to update several of its components:
- Environment Variables: Update or add new environment variables as needed - Covered here.
- Domains - Primary & other: Modify primary and add other custom domains as needed - Covered here.
- Add Password Protection: Select whether your website should be hidden with a password & what that password should be - Covered here.
- Change Environment Branch: - Covered below.
- Change WordPress Environment - Covered below.
It is worth noting that updates to most of these components require a rebuild of the environment for changes to take effect, except for adding domains & updating the WordPress environment.
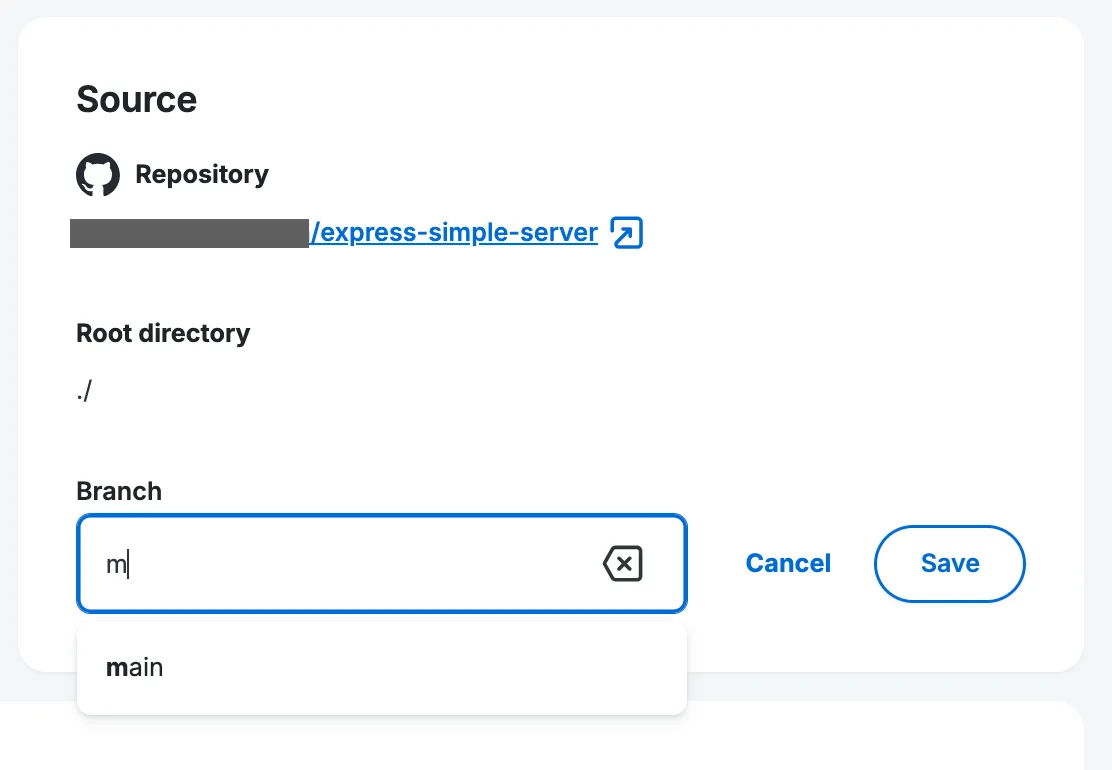
Updating Environment Repository Branch
Section titled “Updating Environment Repository Branch”If you delete your original repository branch or want to build from a different branch, you can do it by clicking on the Edit button next to the branch name, selecting a branch and clicking Save:
Clicking Save on edit branch will present you with a popup to Confirm redeployment of the environment (from the new branch’s code). You have the option to also check the Don't show this again checkbox if you want all future redeploys to trigger without this popup.
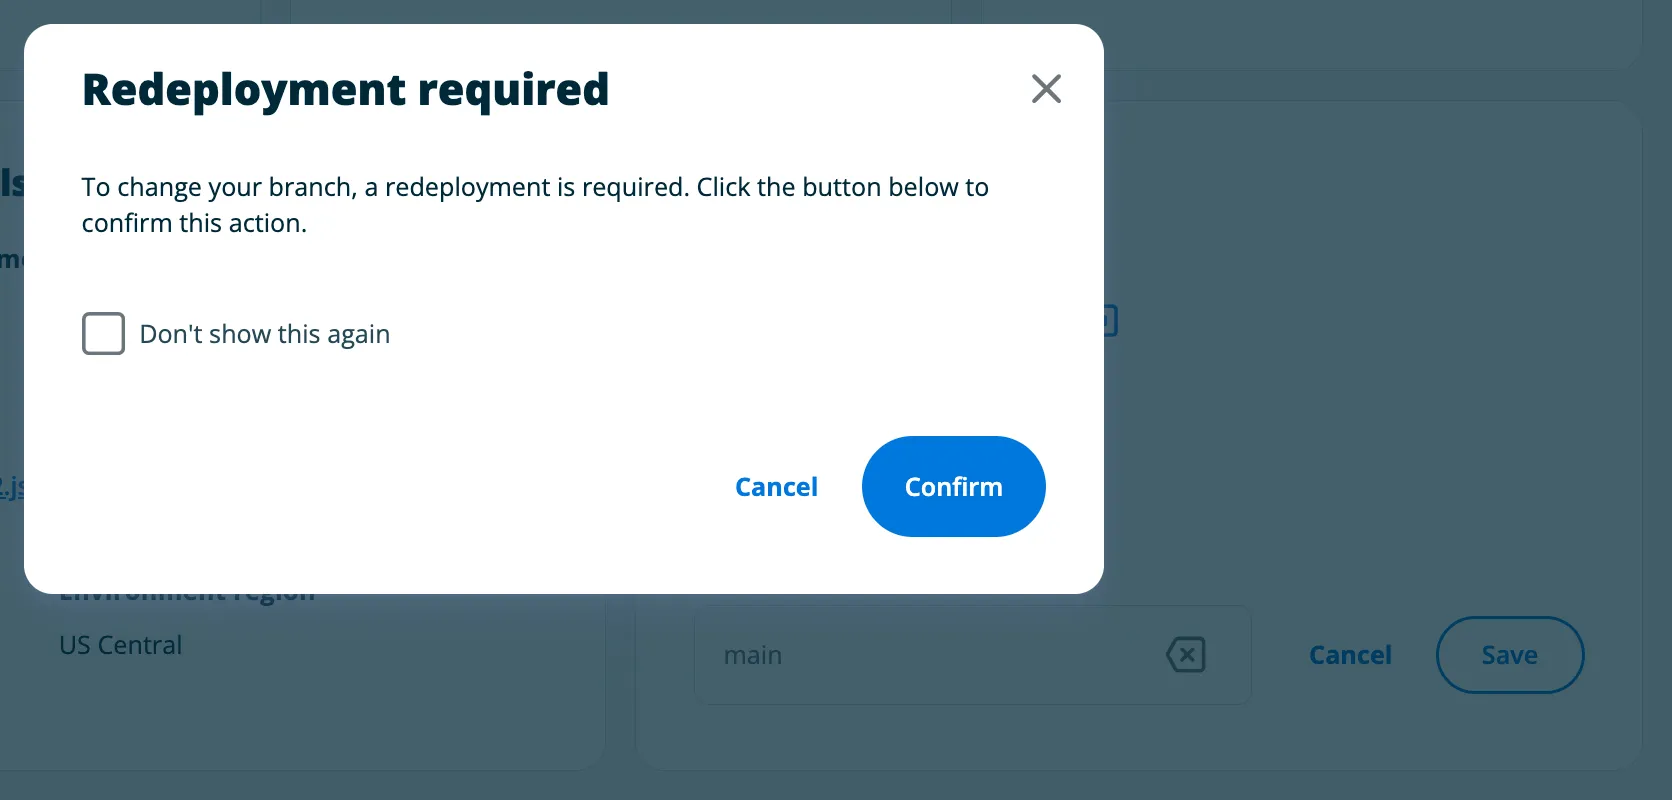
For all subsequent builds the code will be sourced from the new branch you selected and all commits to this branch will cause the environment to rebuild.
You can’t change the Git repository linked to a Headless Platform app. If the original repository is gone, you must delete the app and its environments, then create a new app that pulls from the correct repository.
Updating linked WordPress Environment
Section titled “Updating linked WordPress Environment”To change the linked WordPress environment, click the settings cog by the WordPress environment name. From there, select a new environment, choose your plugin installation preference, and click Save:
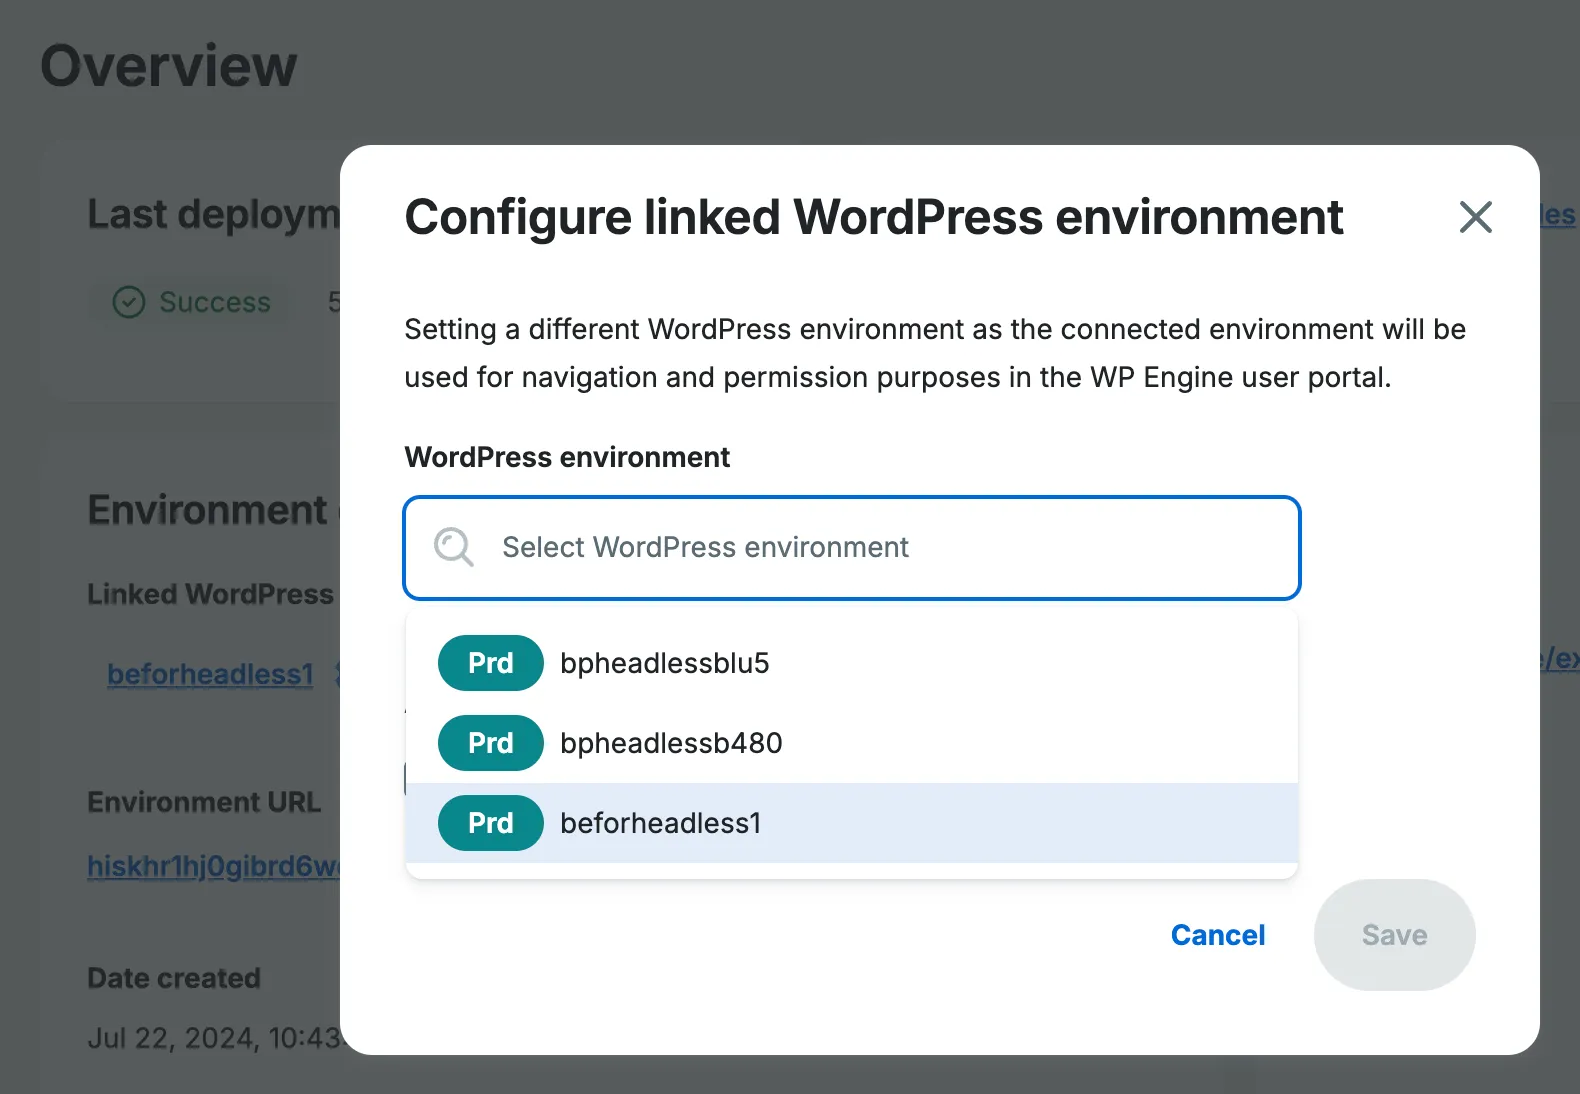

Clicking Save will apply your changes, and if applicable install Headless plugins. All environment builds (new & existing) will now refer to this WordPress environment.