Troubleshooting Builds
In this guide, you’ll learn how to troubleshoot failing builds by examining build logs, comparing logs across your commit history and clearing app and CDN caches.
Currently Published Build
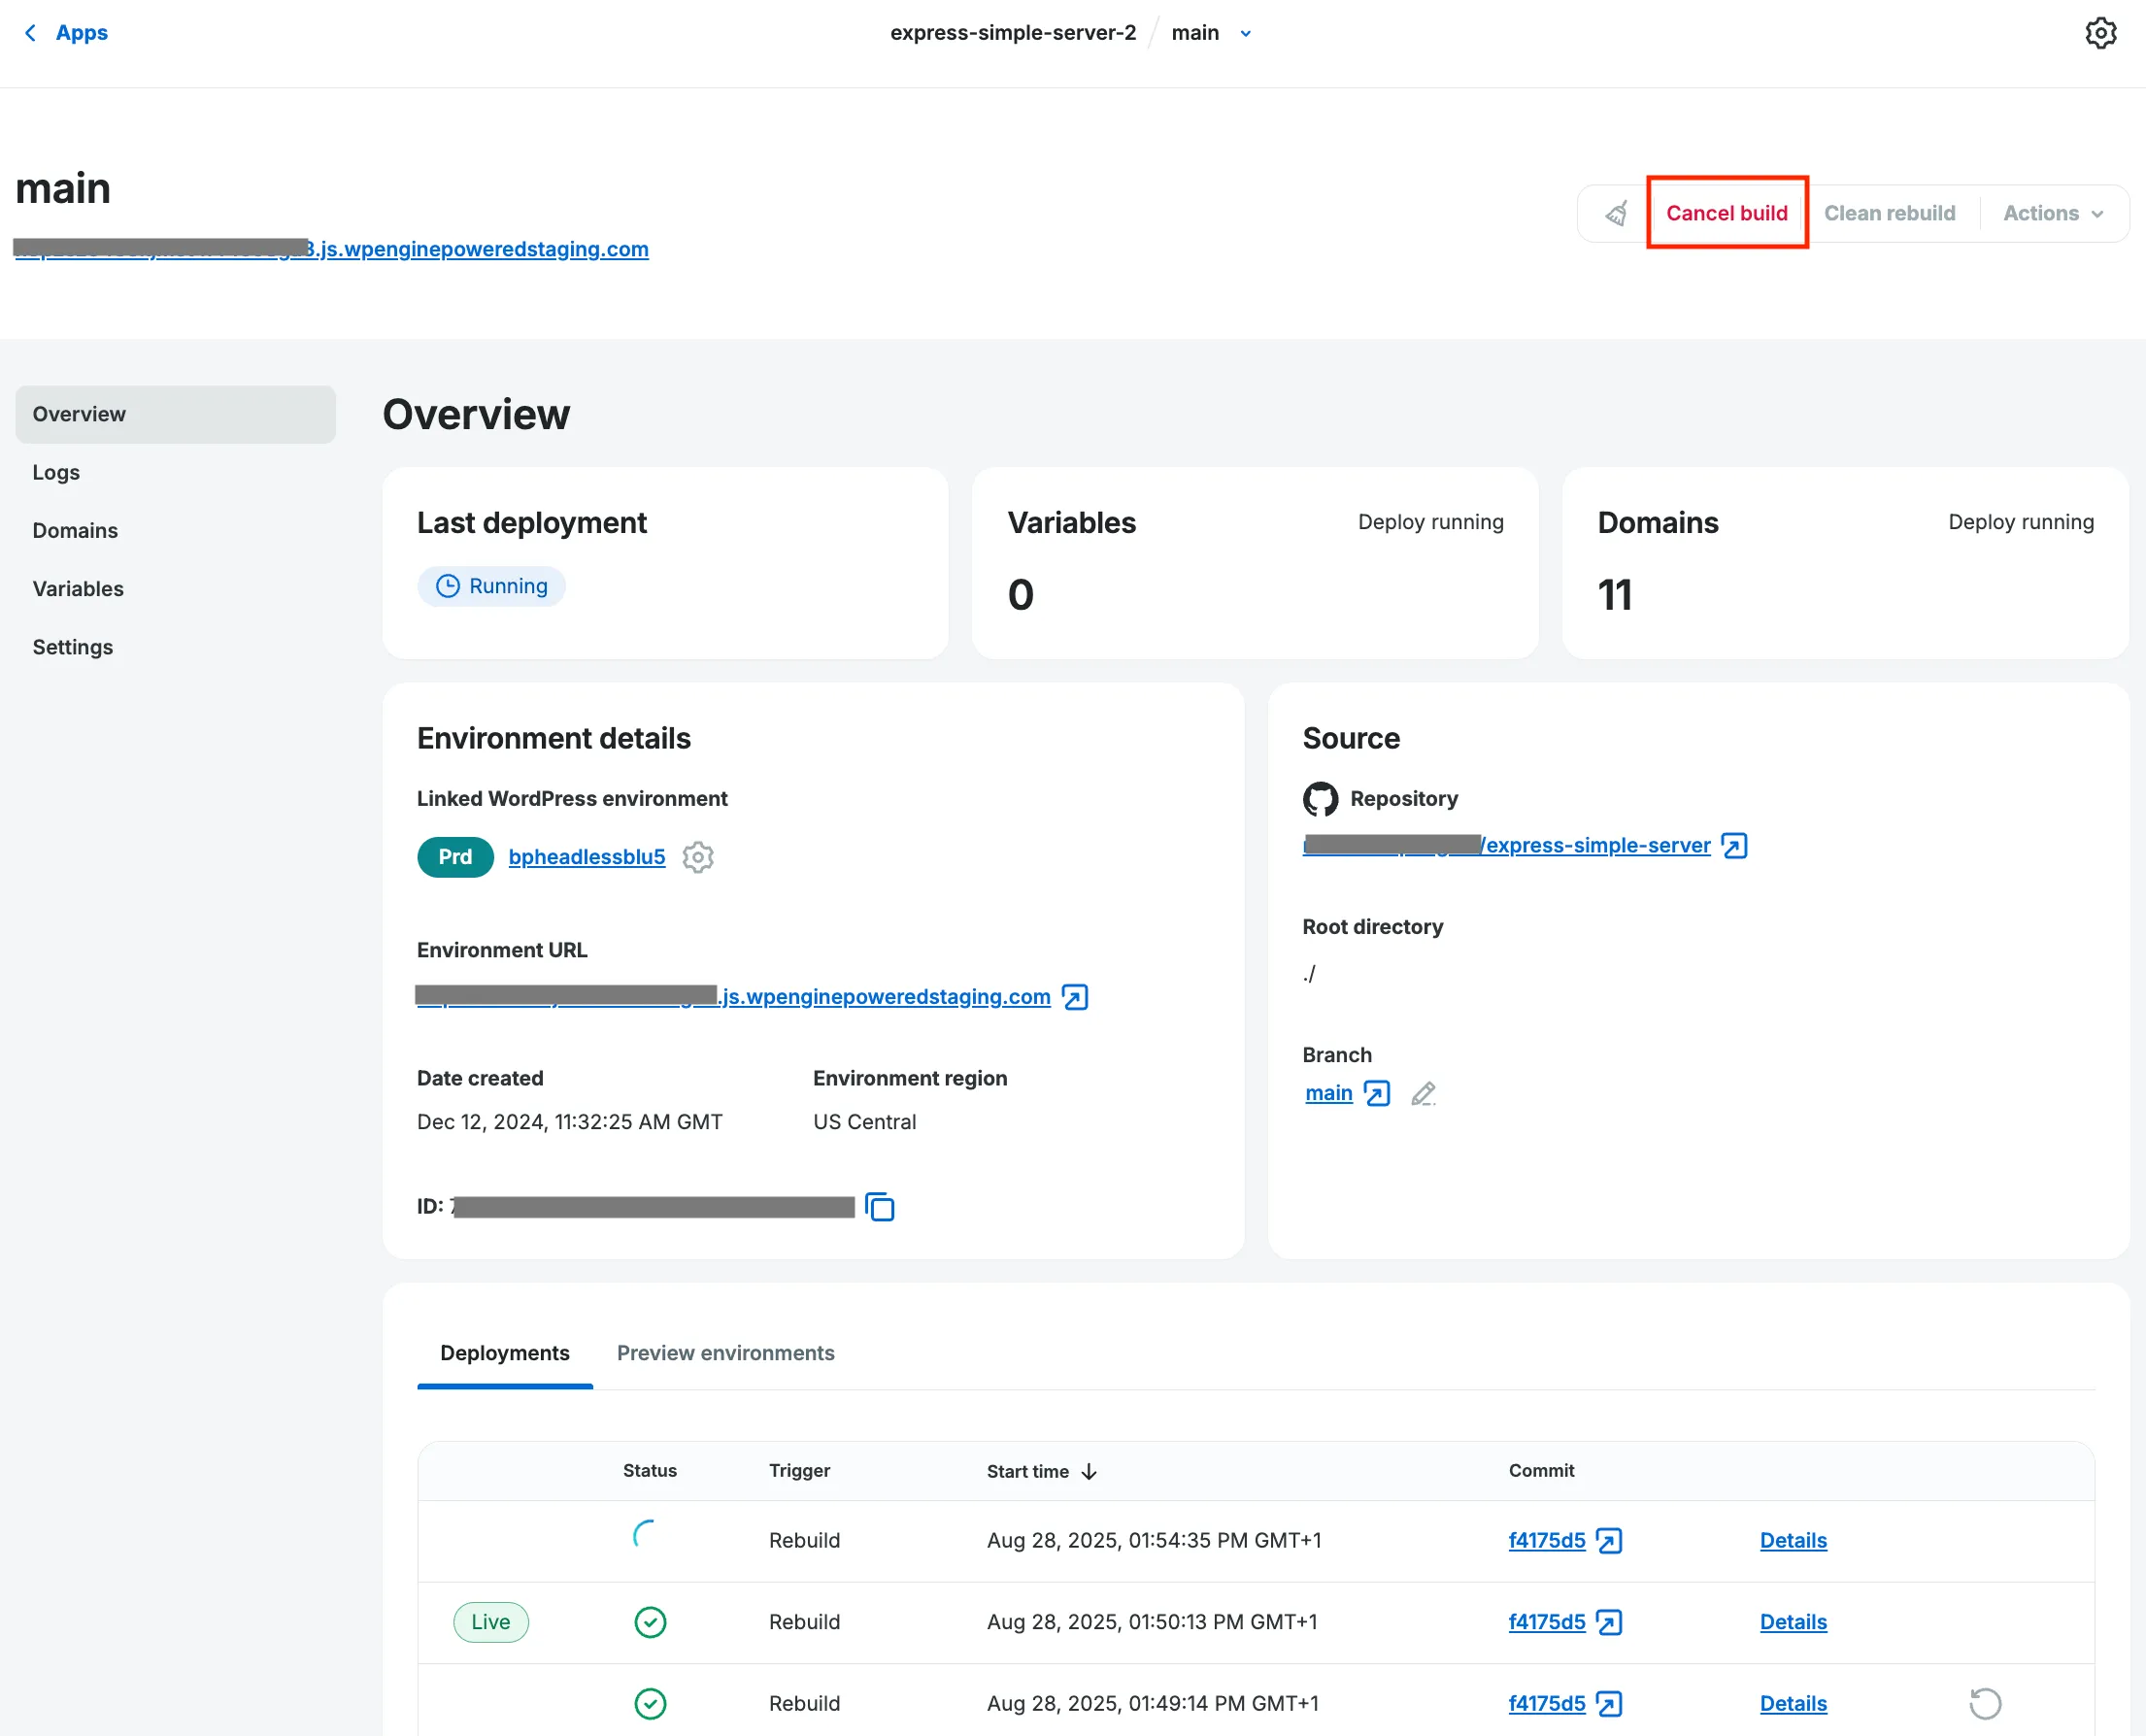
Section titled “Currently Published Build”You can check which version of your site is currently live by navigating to the Deployments table, at the base of the Headless Platform app’s Environment Details/ (“Environment Overview”) page, and looking for a version that is marked as Live

Cancelling a Build Process
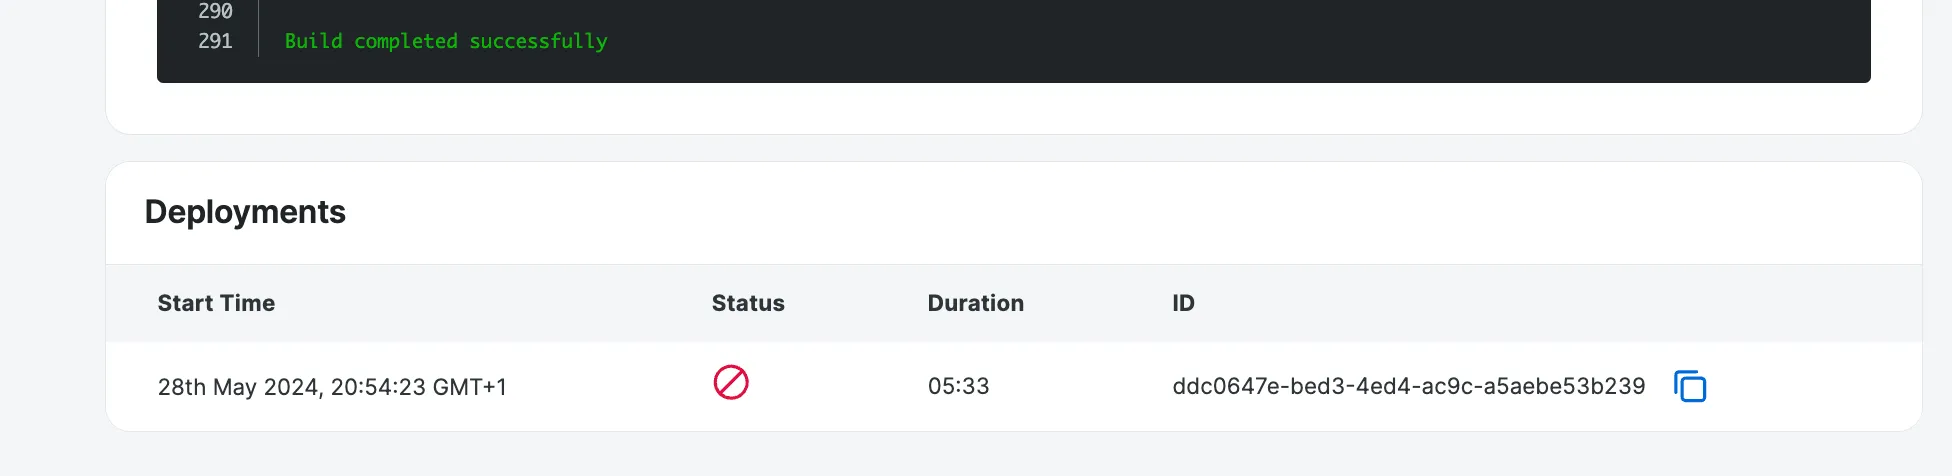
Section titled “Cancelling a Build Process”In case you want to stop an ongoing build, you can click on the Cancel build button displayed in the top right corner of your Environment Overview page:
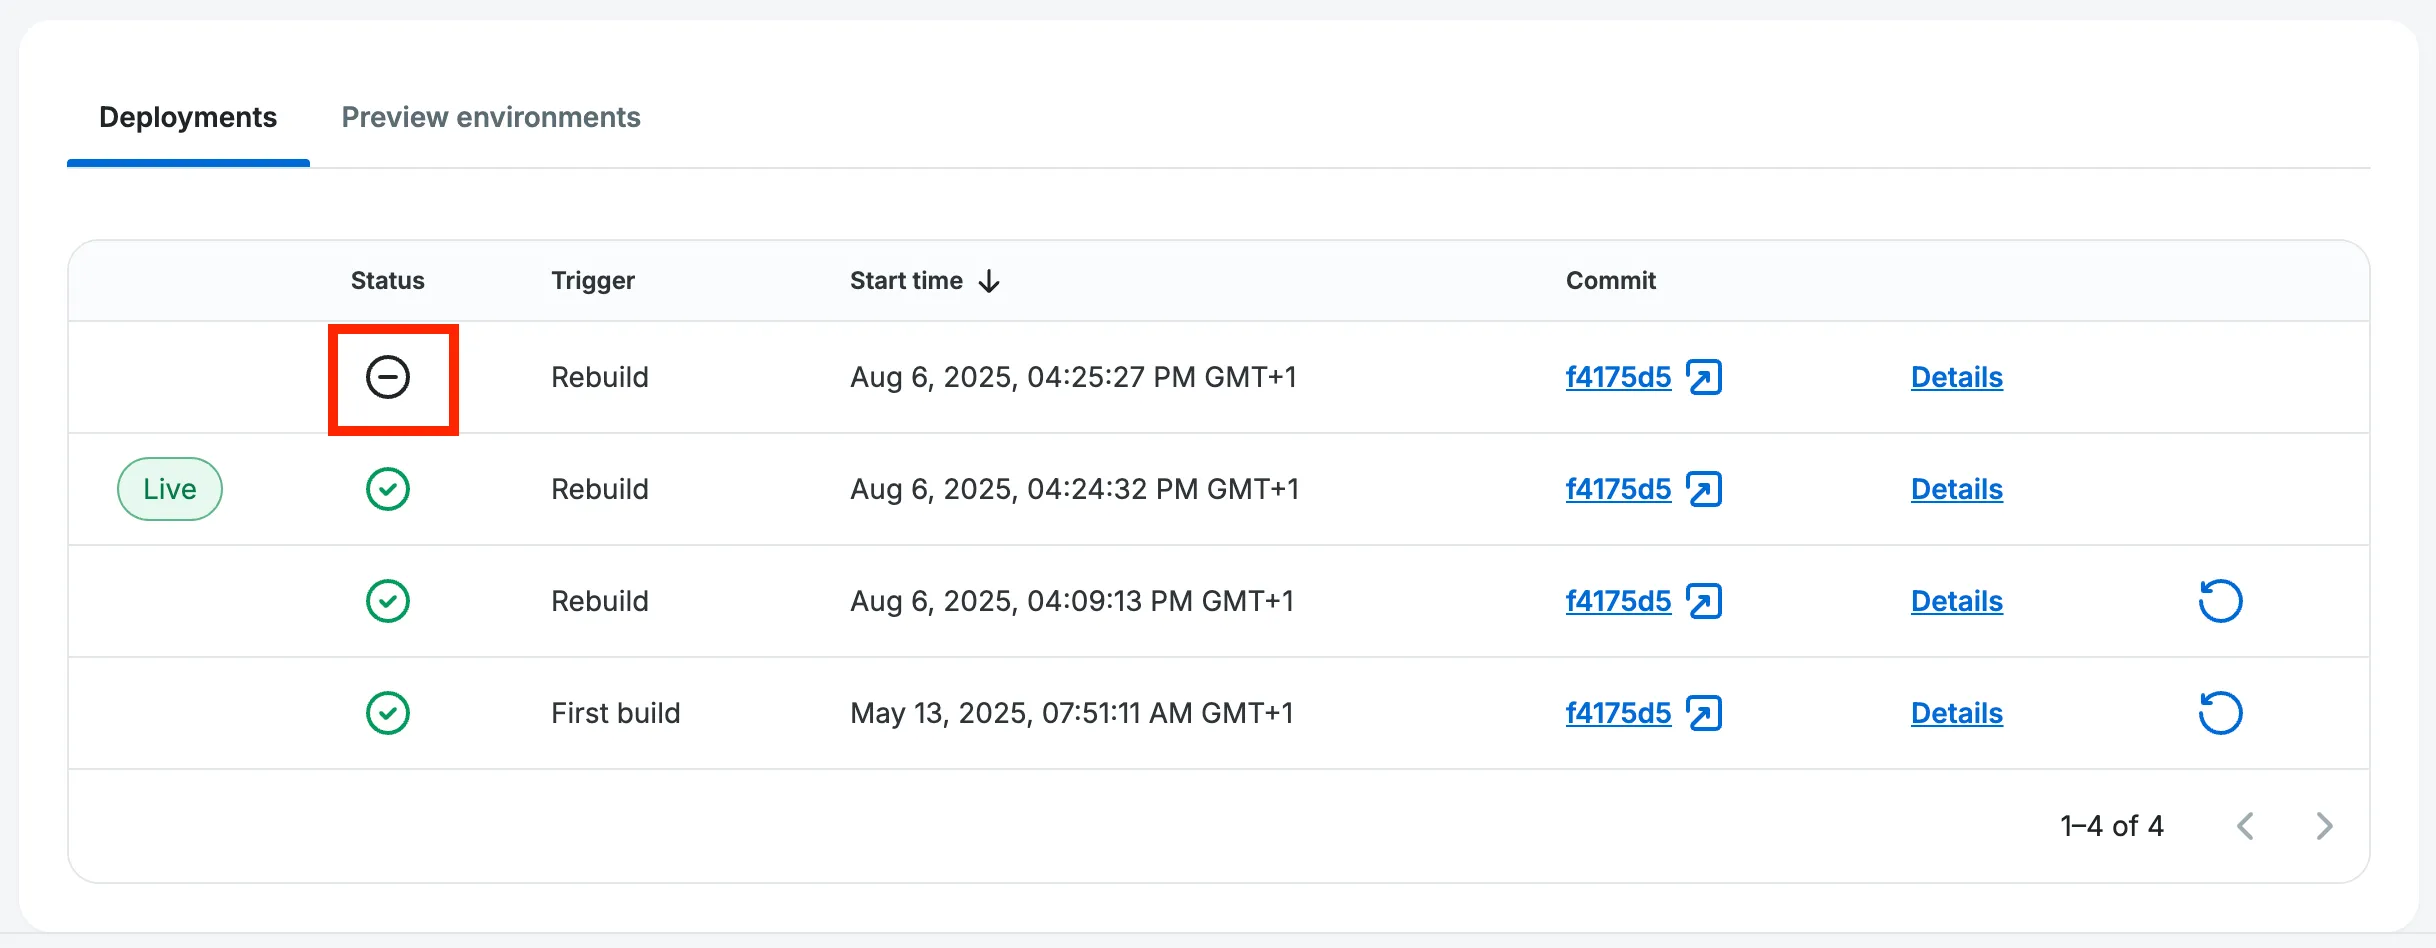
Your build will be displayed in the aforementioned Deployments table table with the status Cancelled icon - and the changes that were supposed to be rolled out will not be pushed to your site.
Responding to Failed Builds
Section titled “Responding to Failed Builds”When you push new code to your Headless Platform app and trigger a new environment build, you can inspect the progress of that build in realtime via the User Portal.
As the build progresses, it can either succeed or fail at any stage in the build or deployment. If the project fails to build, the build details on your Headless Platform Environment Overview page’s Last deployment cards will look like this:
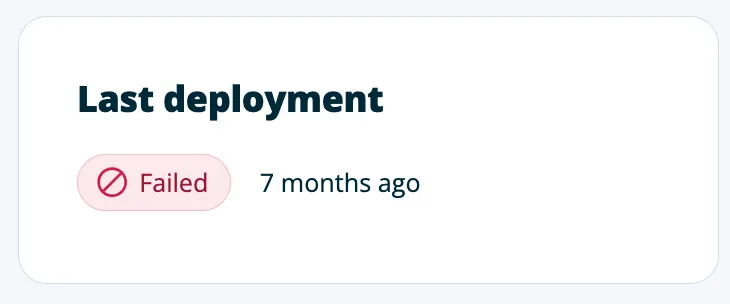
Since our Headless Platform accepts a wide variety of frontend application frameworks (Faust.js, Next.js, Nuxt, Svelte, React, Remix, etc.), there are many different ways that building a particular application could fail. Since there are few commonalities in these failure modes, this guide will focus on giving you the tools to inspect and diagnose your own app’s failure state.
After you’ve pushed a failing build, there are quick ways to start troubleshooting your app/ environment (from the Environment Overview page) by inspecting the repository commit or looking at the Build Logs directly.
From the Deployments table you can access an individual deployment/ build’s Build Logs via the Details link for a row/ build:

Build Logs
Section titled “Build Logs”If you open the Build Details page, via the Details link in the Deployments table, you will have more details about the build itself, as well as access to the errors and logs for your build.
At the top of that page, there is a section with additional details about a particular build. You can see things like the time the build started, the repo and branch that the Headless Platform tried to build from, as well as another commit hash link to your repository. Each individual build is also given a unique ID, and this might be needed if you try to escalate continued failing builds with support.
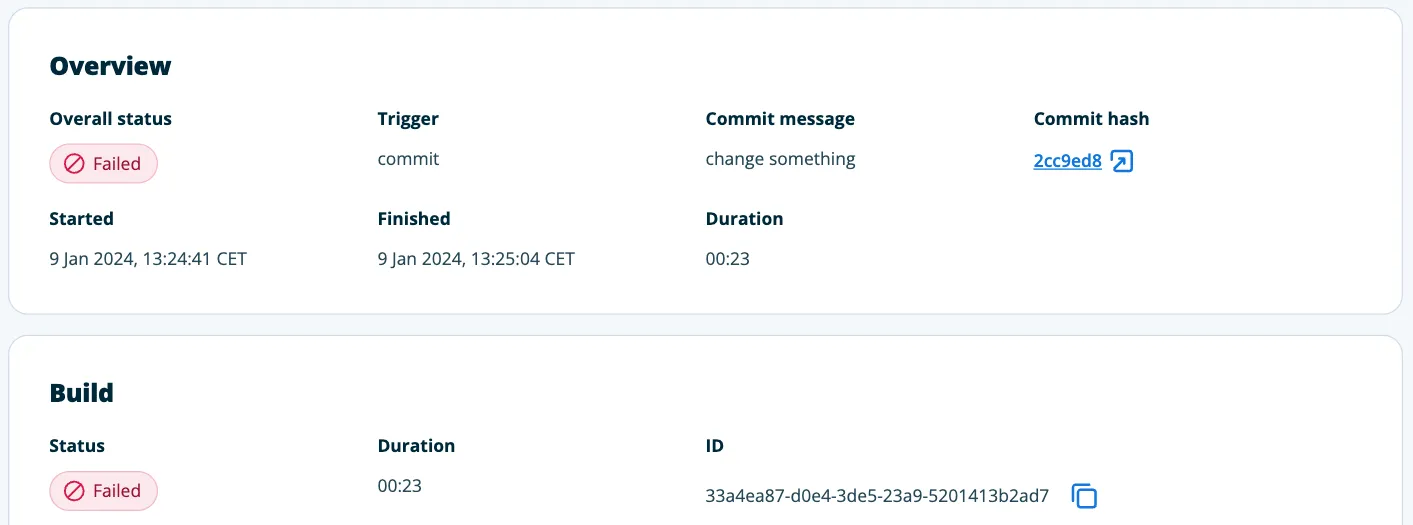
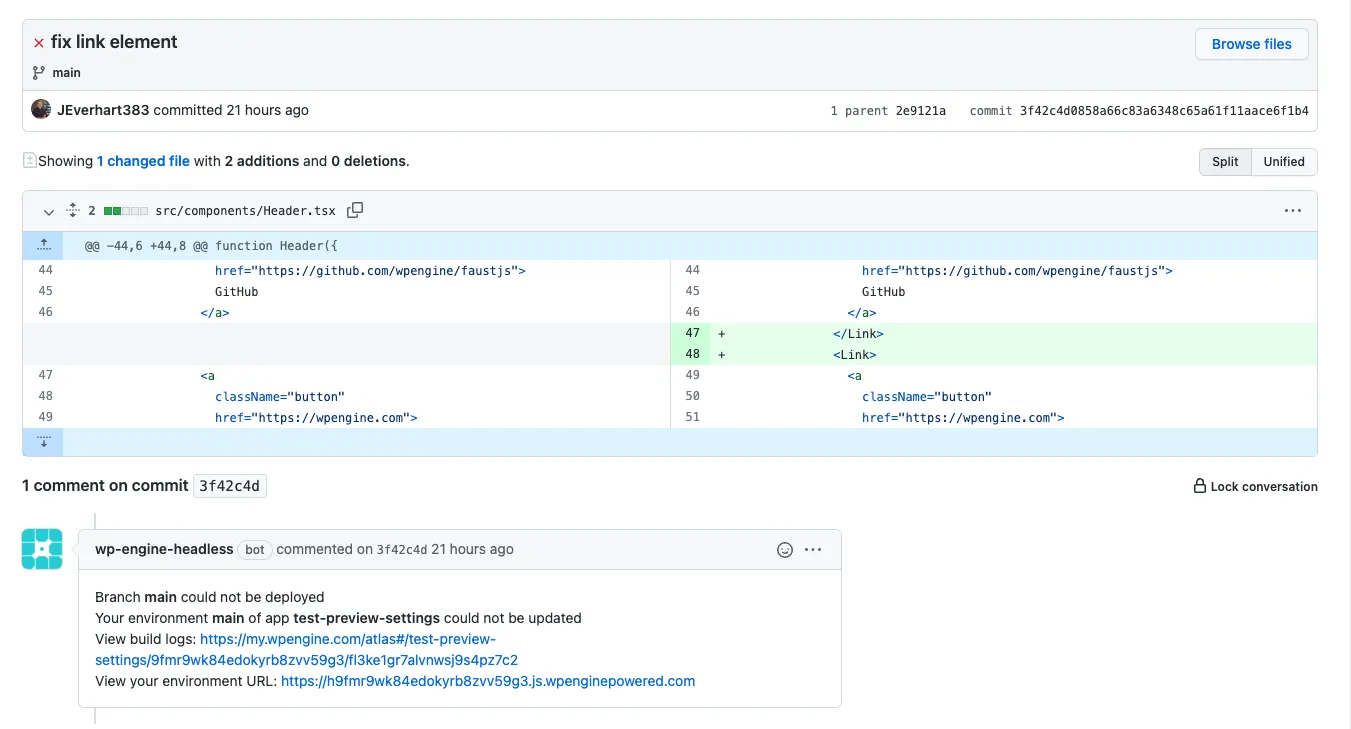
If you click on the commit hash link in the build details screen (shown above), you will be taken directly to the repository commit diff for that particular commit, within your supported repository hosting service provider (GitHub, GitLab or Bitbucket). This view provides you with an easily-scannable summary of everything that changed, and you will see an automated message from the WP Engine bot with some details about your build. It should tell you the status of the build, whether it succeeded or failed, and also provide you with links directly to the build logs, the preview environment site, and access the preview environment’s details page (Portal). Below is the GitHub equivalent:
Note: Builds which are not Live and which are greater than 90 days old will lack Build Logs - as these will be archived.
Logging Output
Section titled “Logging Output”The logging output pane labeled Logs captures all of the logging output from your build.
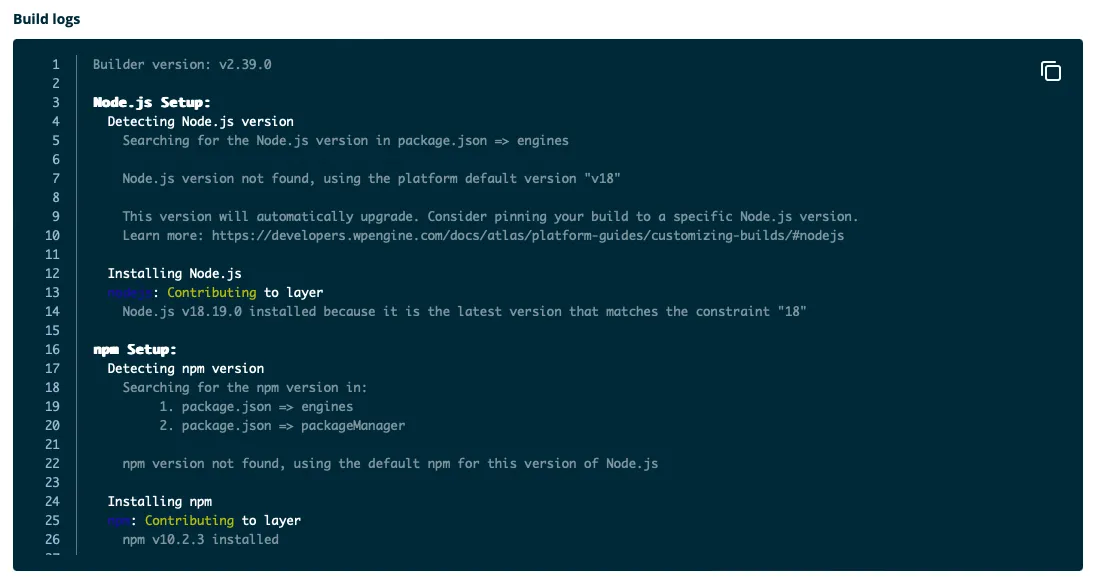
The logging output available in this pane can be extremely useful for tracking down any issues that are related to your dependencies or their installation.
Logging Debug Mode
Section titled “Logging Debug Mode”Debug logging can be enabled for builds to aid with troubleshooting issues. This adds extra information to the log output such as listing npm installed packages and prints your package.json. This is useful if you are contacting support.
To enable debug mode for a build, set the environment variable HEADLESS_BUILD_DEBUG=true and rebuild your app. The log output will start with this line once debug mode is enabled:
Debug mode enabled this can cause builds to be slowAccessing Prior Builds
Section titled “Accessing Prior Builds”If you have examined the logging and error output for your build, and still aren’t sure what the issue is, a helpful next step could be to compare the build logs or commit histories between your current failed build and the last successful build. You can find a list of your environment’s builds on the Environment Overview page’s Deployments table.

Through this panel, you can access links to the build logs via the leftmost trigger-based link, ex. rebuild, and the commit details via the commit hash link. Comparing errors and logging across different builds can help you isolate when and how breaking changes were introduced.
Note: Builds which are not Live and which are greater than 90 days old will be incapable of rebuilding. They may also lack Build Logs - as these will be archived.
Responding to Failed Deployments
Section titled “Responding to Failed Deployments”If your code build process has completed successfully, but your environment could not be deployed, you’ll see the following error in your Deployments table:
That often means that for various reasons you application could not be started. In this case, we recommend you visiting the Runtime Logs page to review any errors that appear in your logs.
Resolving Common Issues
Section titled “Resolving Common Issues”Make sure the branch and repository you’re pulling from exists
Section titled “Make sure the branch and repository you’re pulling from exists”If you’ve deleted your branch or repository, you’ll see the following banner message on the environment Overview page:
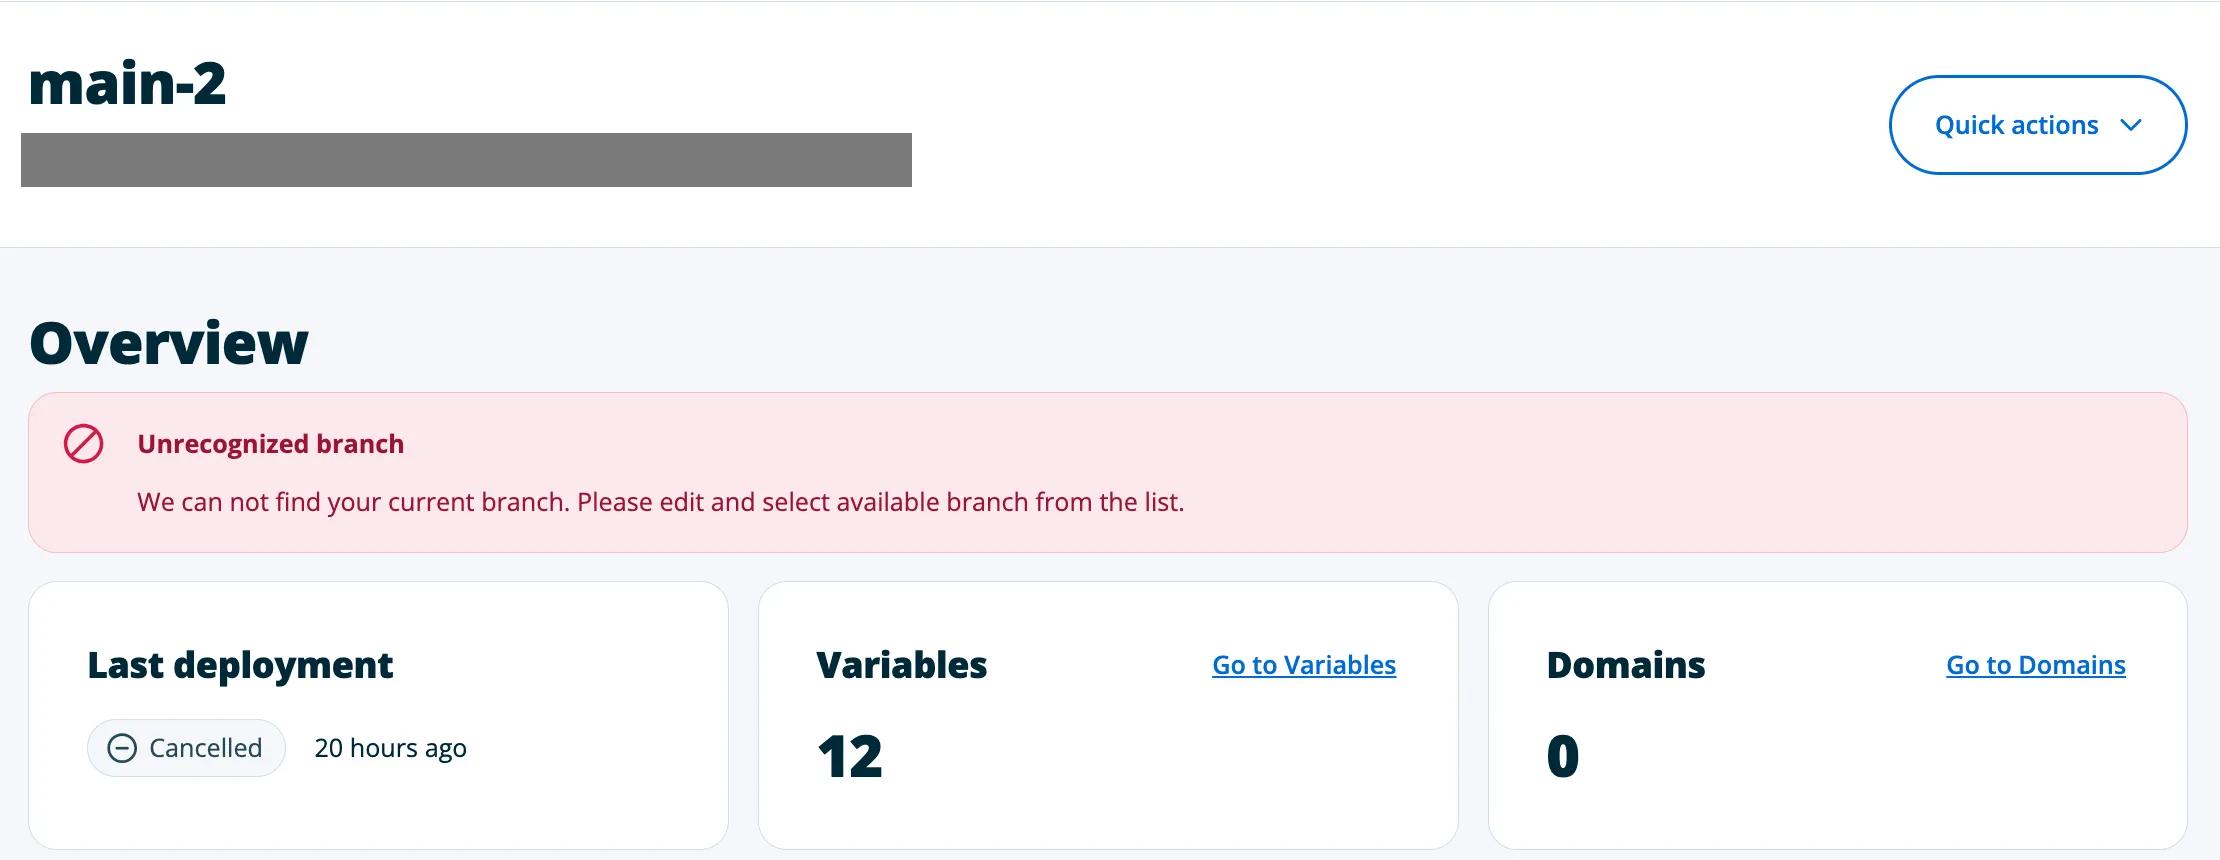
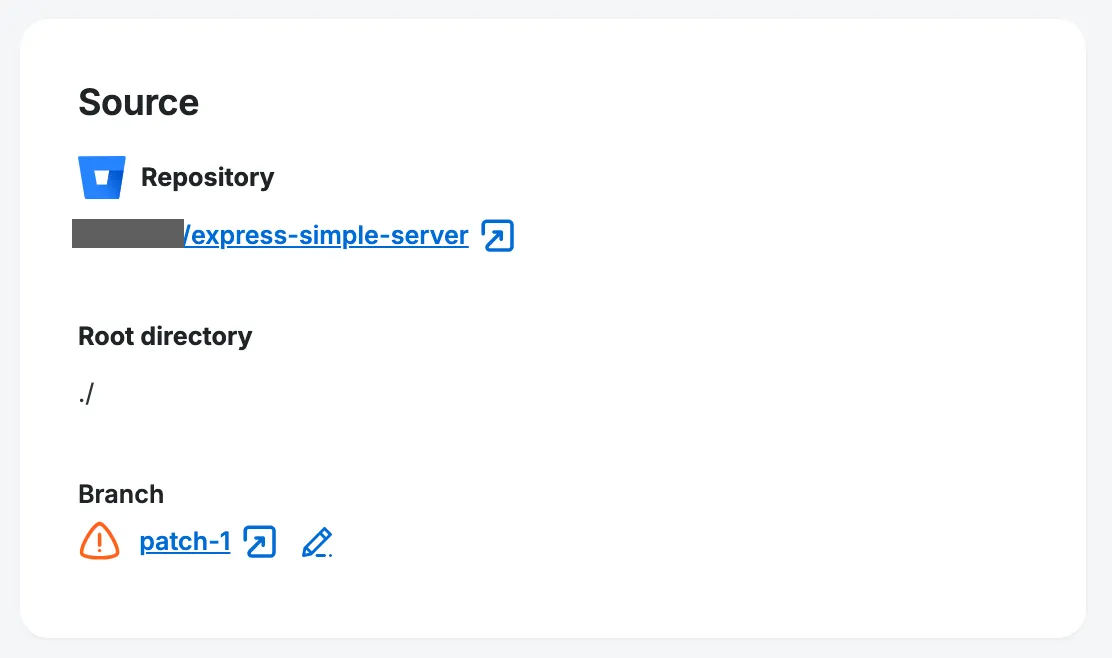
You will also see an alert next to the branch name on the Source card:
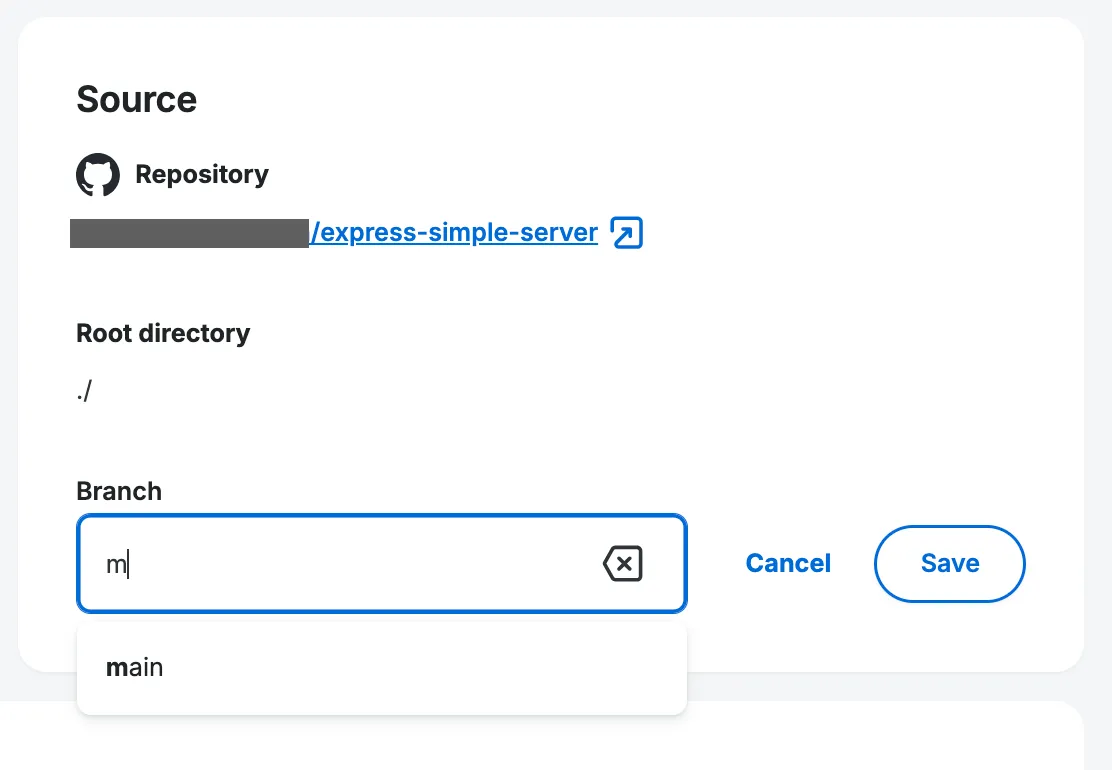
If you delete your branch or want to build from a different branch, you can do it by clicking on the Edit button next to the branch name, selecting a branch and clicking Save:
Clicking Save on edit branch will present you with a popup to Confirm redeployment of the environment (from the new branch’s code). You have the option to also check the Don't show this again checkbox if you want all future redeploys to trigger without this popup.

For all subsequent builds the code will be sourced from the new branch you selected and all commits to this branch will cause the environment to rebuild.
At the moment, there’s no way to change the repository your Headless Platform app is pulling code from. If you’ve deleted the repository, you will have to delete your environments and your Headless Platform app and then create a new one, pulling code from your new repository.
Make sure the WordPress environment that you are using for data still exists
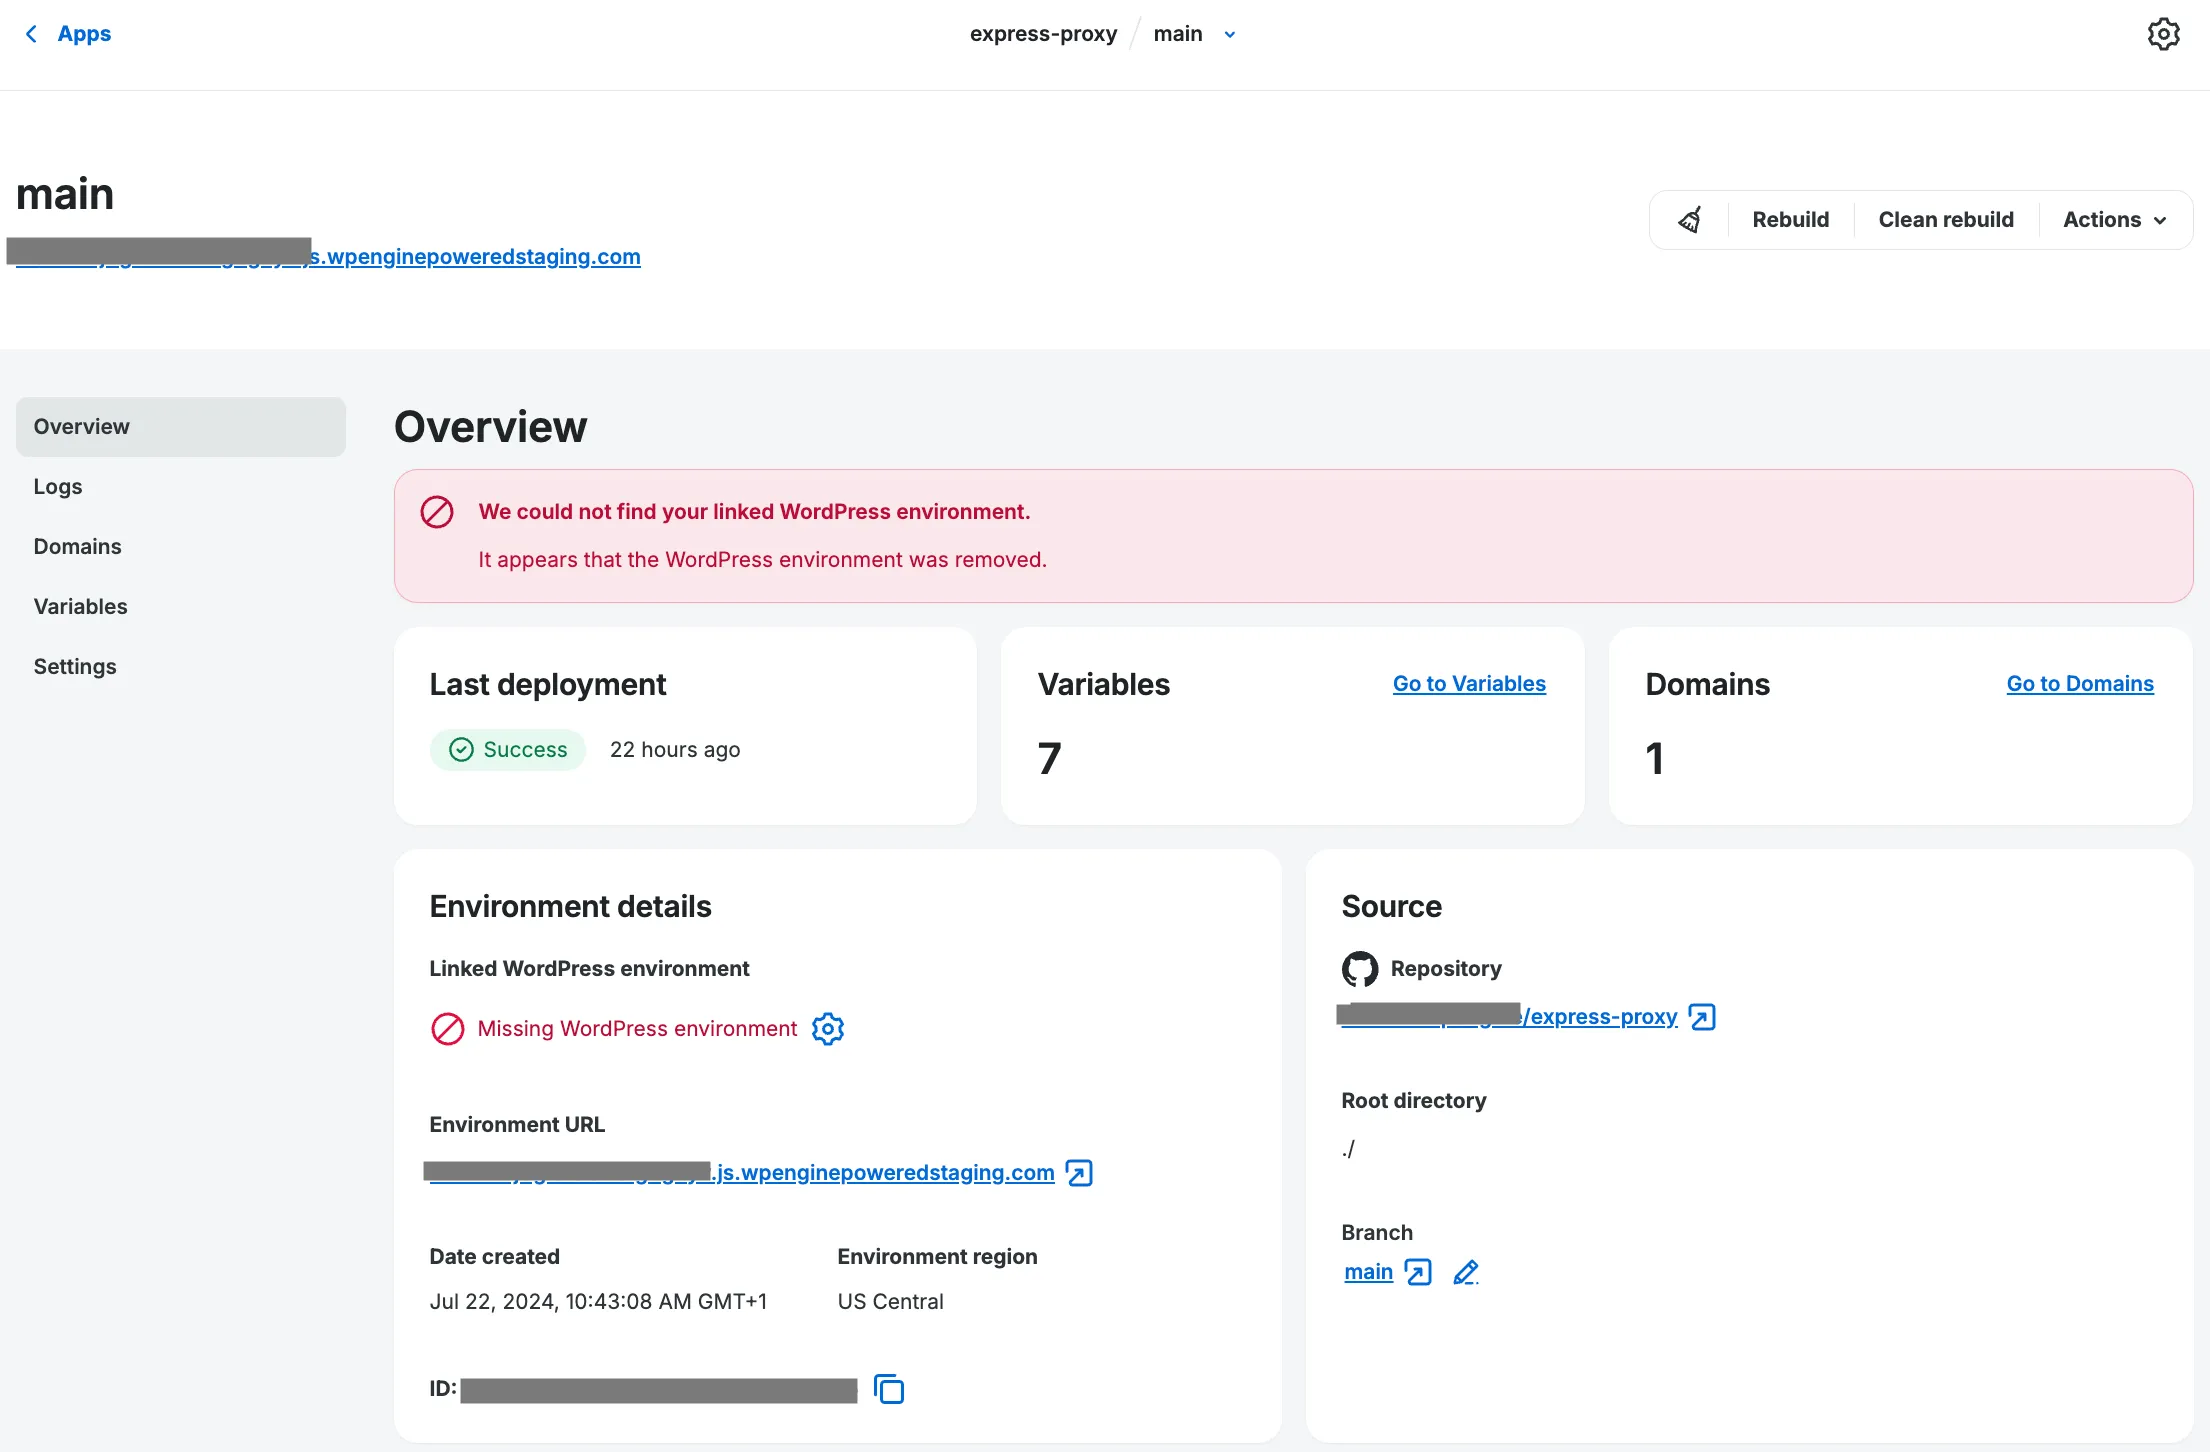
Section titled “Make sure the WordPress environment that you are using for data still exists”If your WordPress environment has been deleted or is otherwise unavailable, you will encounter the We could not find your linked WordPress environment banner and a following Missing WordPress environment error on the Environment details card - both of which are shown here:
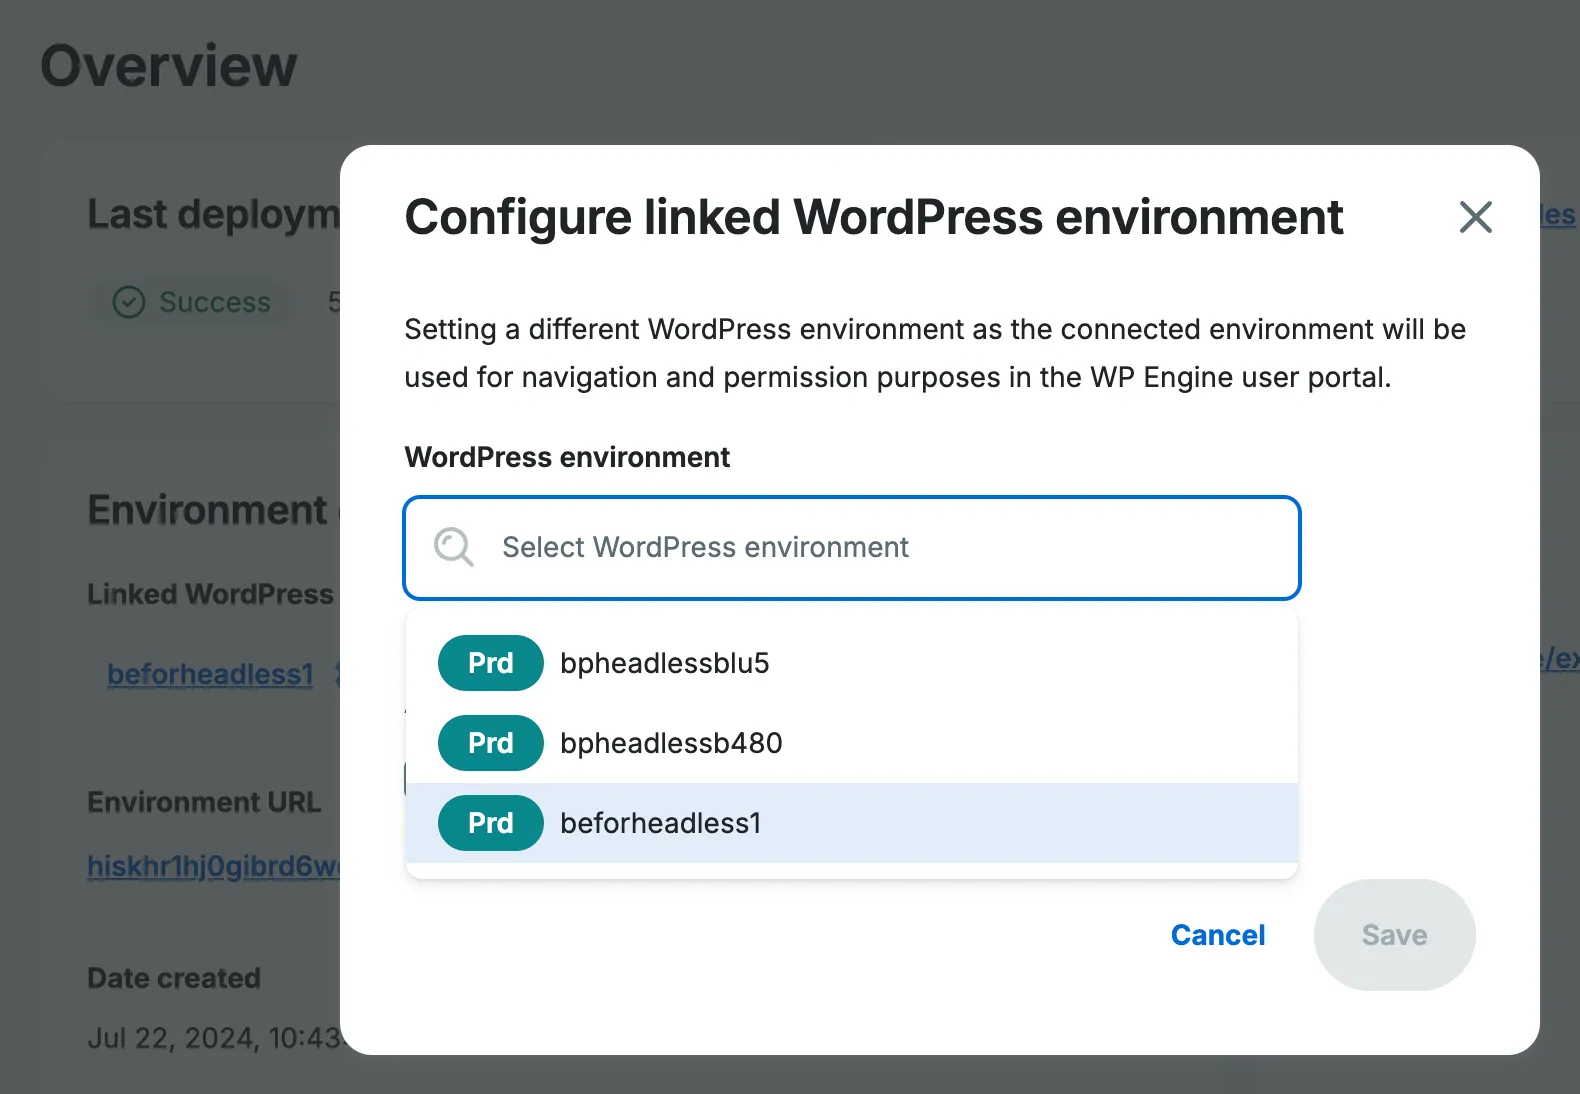
To change the linked WordPress environment, click the settings cog by the WordPress environment name. From there, select a new environment, choose your plugin installation preference, and click Save:

Clicking Save will apply your changes, and if applicable install Headless plugins. All environment builds (new & existing) will now refer to this WordPress environment.
Creating a Blueprint Fails
Section titled “Creating a Blueprint Fails”- If you selected to create a repository within a supported repository hosting service provider’s (GitHub, GitLab or Bitbucket) organization (called ‘namespace’ for Bitbucket), make sure the user you’re authenticated as has enough permissions to create new repositories in this organization/ namespace.
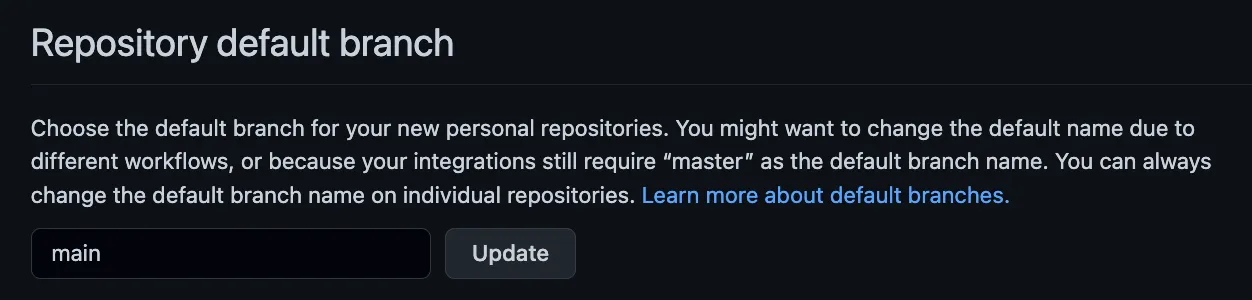
- For Blueprints to work properly, we - for now - require your default branch to be called ‘main’. You can change this setting globally for all new repositories in your chosen repository provider. Below is the GitHub equivalent:
Other Build Issues
Section titled “Other Build Issues”In some cases, your app environment will successfully build, but you may not see the correct visual results on the live site, or code that should be a part of your app environment isn’t working. If this is the case, a good next step would be to clear out any assets from previous builds and make sure that no older files are still being served from a CDN.
Clean Rebuild and Clear Domain Cache
Section titled “Clean Rebuild and Clear Domain Cache”It’s important to understand how our platform handles builds. When you deploy from a repository commit, it does not trigger a Clean Rebuild. Instead, the platform uses previously cached folders to accelerate the process.
While our Headless Platform supports many JavaScript frameworks, discussing each one’s specific caching method is outside the scope of this guide. For a list of the folders our platform caches by default, please see the Framework Build Assets Cache section.
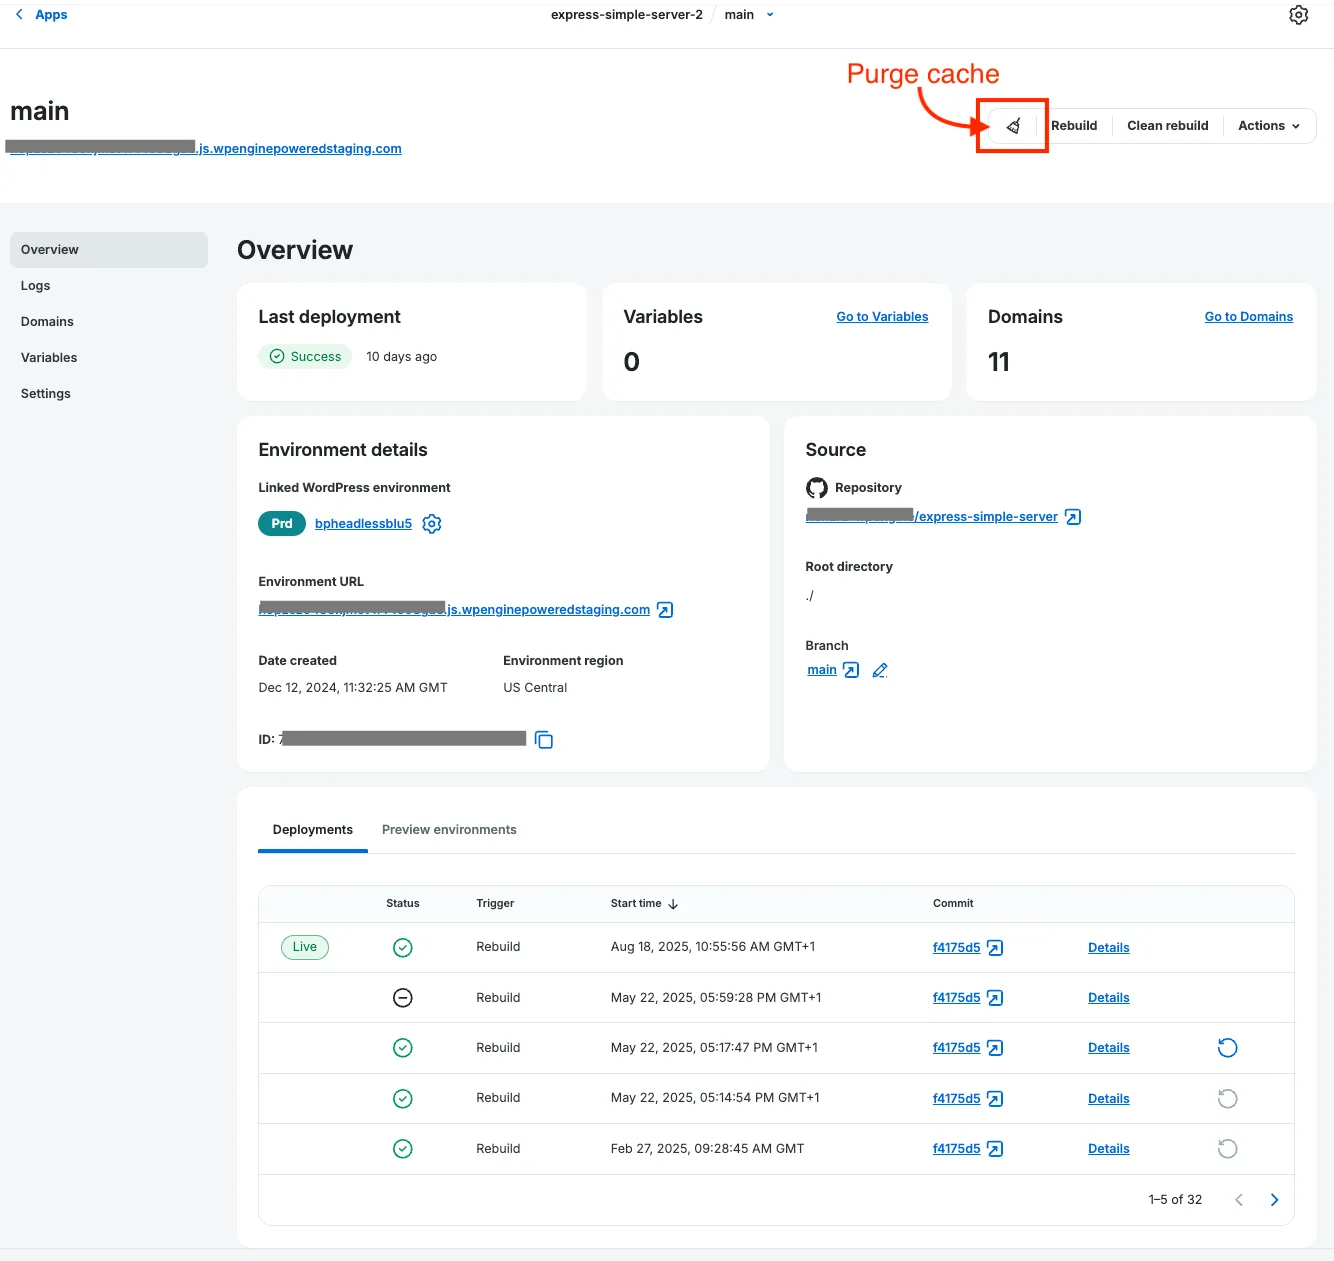
To process a Clean rebuild you can click that button in the main details panel of your Headless Platform environment, which will remove all previously cached folders, pull the latest commit from your repo, and rebuild the app.
In some cases, you may also want to clear the domain cache using the Purge cache button, which is a small brush icon (highlighted in above screenshot), which clears the CDN cache for your domain. Both of these steps can be helpful if your site is building, but might not reflect the most recent changes.