Domain mapping
In this guide, you will learn how to map a custom domain name to an environment within your Headless Platform application (“app”), or to the WordPress backend that powers it.
During creation every Headless environment automatically receives a unique, WP Engine-owned, default domain URL but you may wish to replace this with your own one. Custom domains allow you to make sure that your app’s production environment is available at a user-friendly URL, like mydomain.com, but also that the app’s non-production environments can maintain a URL commonality within their own custom domain deinitions - like staging.mydomain.com,dev.mydomain.com, or cms.mydomain.com.
While some users may wish to customize those non-production environment domain URLs as well, doing so is less common. In all cases the default domain URL that our Headless Platform automatically generates for each environment can continue to be used indefinitely.
Assigning a custom domain to your WordPress backend is also possible. This is optional but strongly encouraged to gain the most control over your site’s resources. This will be covered later.
Identify a custom domain to use
Section titled “Identify a custom domain to use”There are third-party DNS providers from whom you can purchase a custom domain, or you may already have one that you wish to use.
Once you have a custom domain ready, you will be mapping it to a specific Headless environment. This allows you to configure several variants of your custom domain to several, probably related, environments - e.g. mydomain.com, staging.mydomain.com, etc.
Choose Headless Platform environment
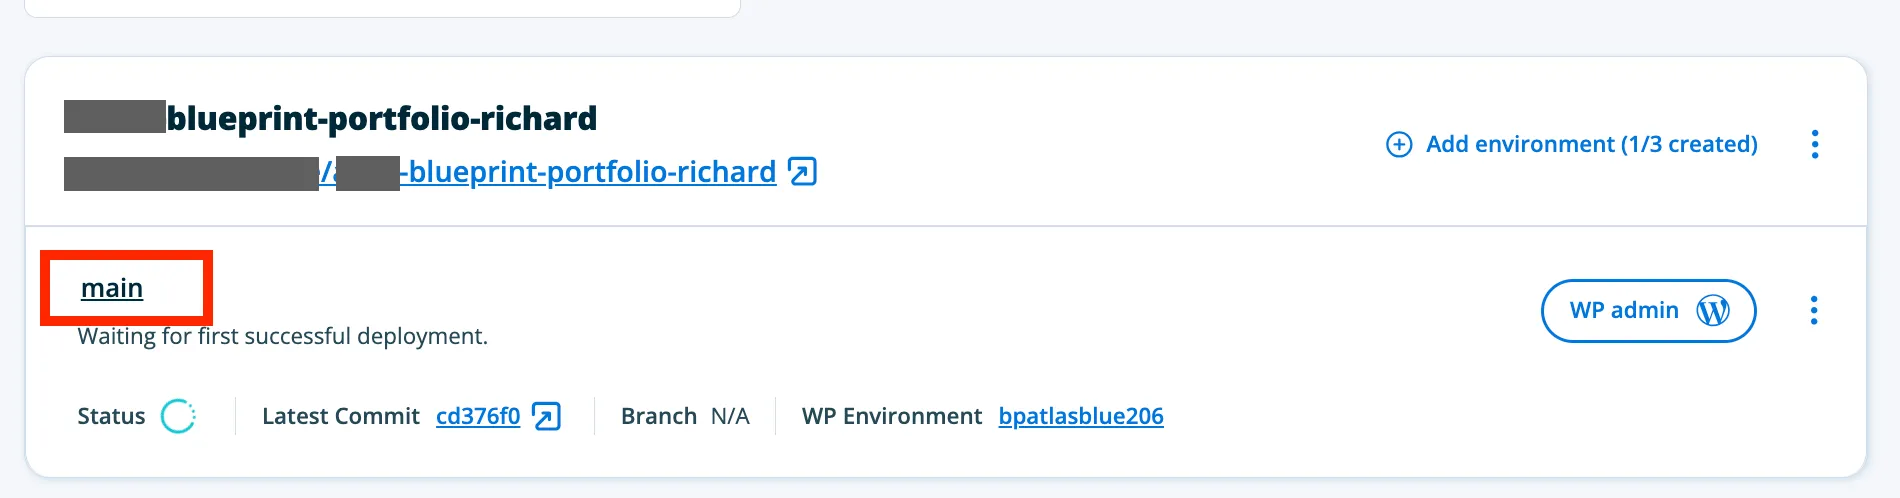
Section titled “Choose Headless Platform environment”Once you are logged in to WP Engine portal, visit the Headless Platform page and choose the Headless Platform app & environment that you want to map to your custom domain - as highlighted in image below.
Access the environment’s Domains page
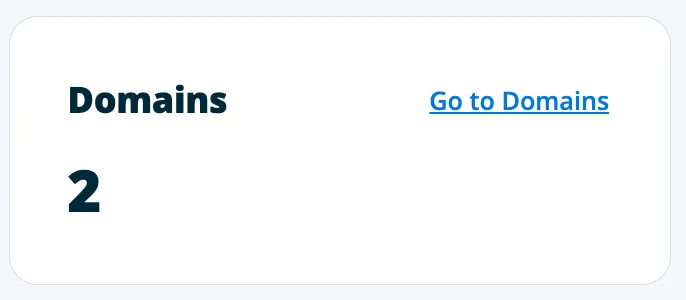
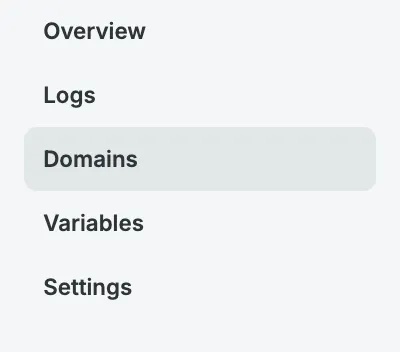
Section titled “Access the environment’s Domains page”After opening your desired environment’s page, you can access its Domains page via the Go to domains link, on the Domains card (first image) or via the left-hand submenu Domains item (second image).
Add a custom domain to your environment
Section titled “Add a custom domain to your environment”-
Once you have accessed your Headless environment’s Domains page you will be presented with a table of existing domains associated with that environment, as shown below. To add a new domain you can click the
Add domainbutton. This will take you to the Add domain flow.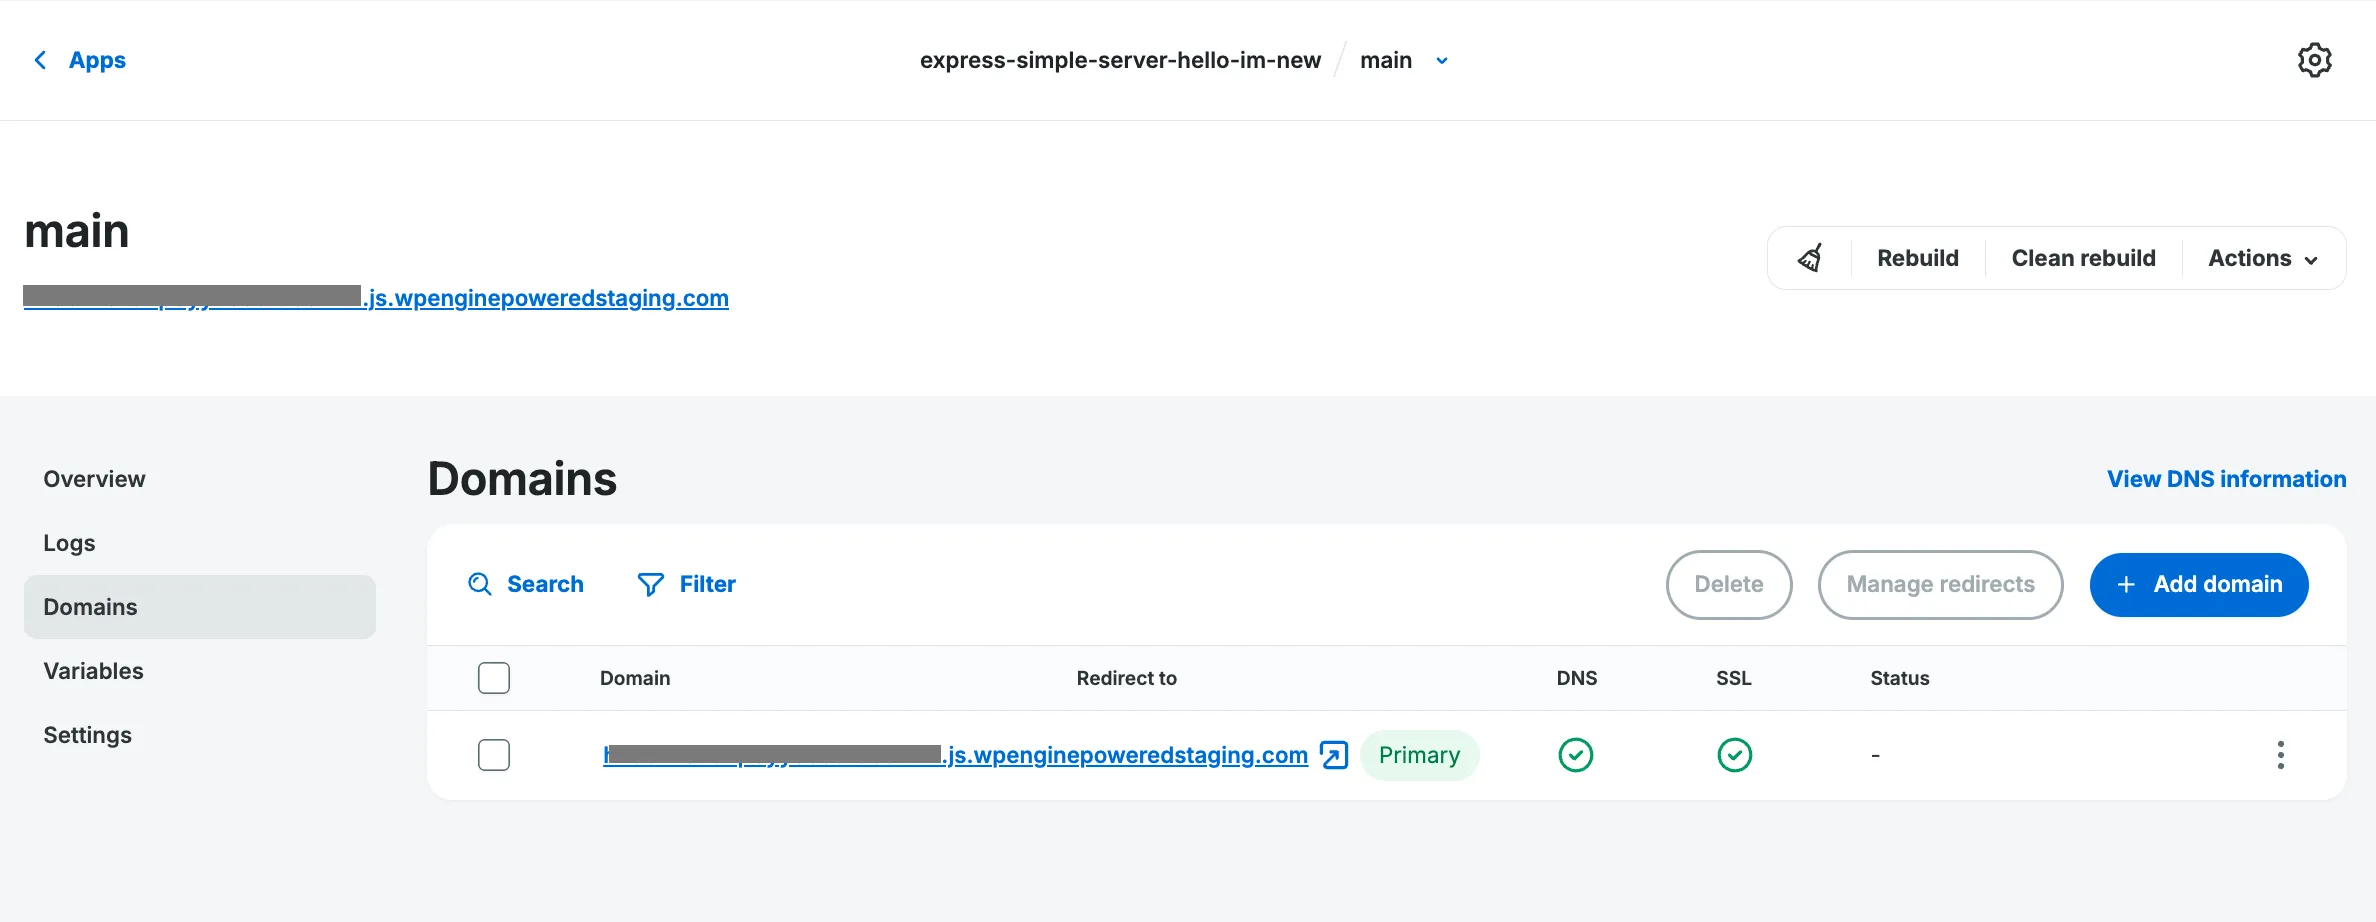
-
The Add domain flow allows you to add one or more Custom domains at once. As you type in one of the
Domain URLinput fields it will validate the URL for you, as shown below. You can add more than one custom domain within this flow by clicking theAdd another domainbutton and by populating the newly-addedDomain URLinput field row.Each custom domain row added here provides a checkbox labeled
Also add www subdomain. By checking any of these you will trigger the Add domain flow’s optional secondChange DNS recordsstep once this first step of the flow has been completed successfully.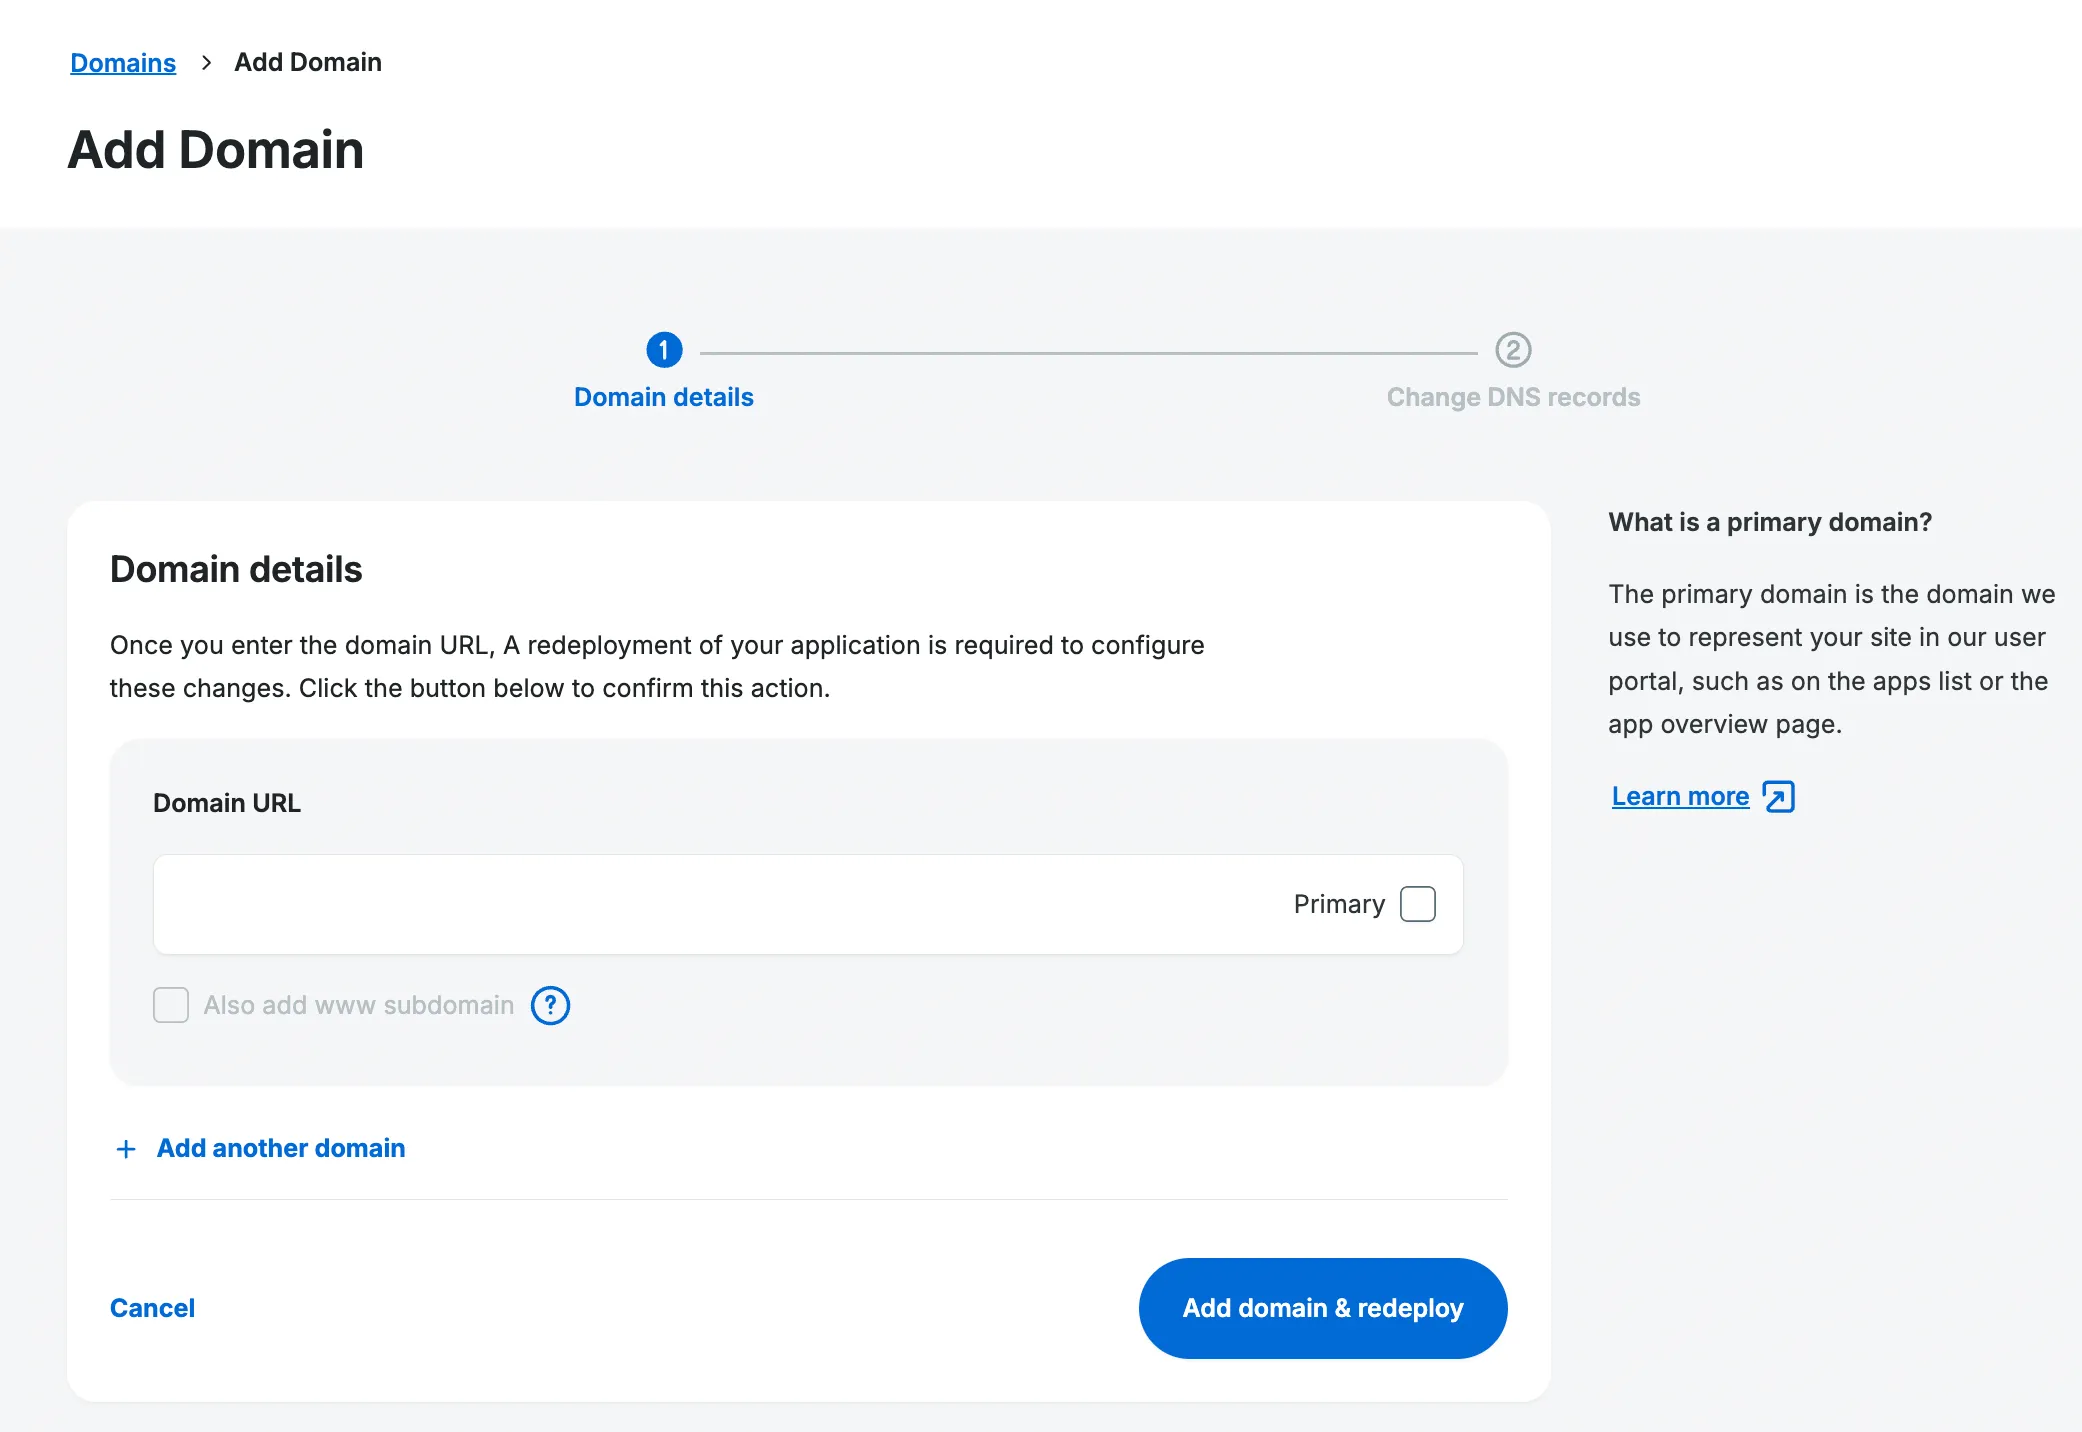
When you have finished adding the custom domain(s) you can choose to nominate one as the
Primarydomain. This is optional and will not take effect until this first step of the flow has been completed successfully. -
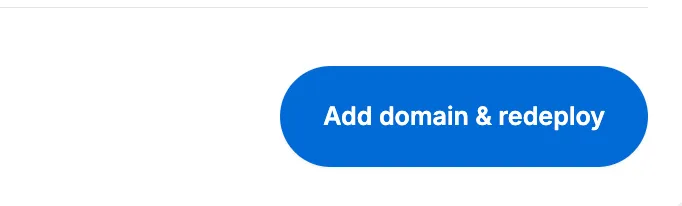
To complete this step of the Add domain flow, click the
Add domain & redeploybutton. This button will confirm and validate your new domain(s) and begin a redeploy of the Headless environment.Additionally, upon successful completion of this flow step and, if applicable, the previous primary domain will be replaced by the new primary domain specified, before redeploy.
-
At this point, if you have not checked the
Also add www subdomaincheckbox for any of the custom domains rows added, you will be redirected back to the environment’s Domains page.However, if you have checked the optional
Also add www subdomaincheckbox for any of custom domains rows added, you will be redirected to the Add domain flow step 2, shown below. This second flow step will show thewwwandnon-wwwURLs for each of the custom domain URL rows which you ticked the checkbox for in the first step of the flow.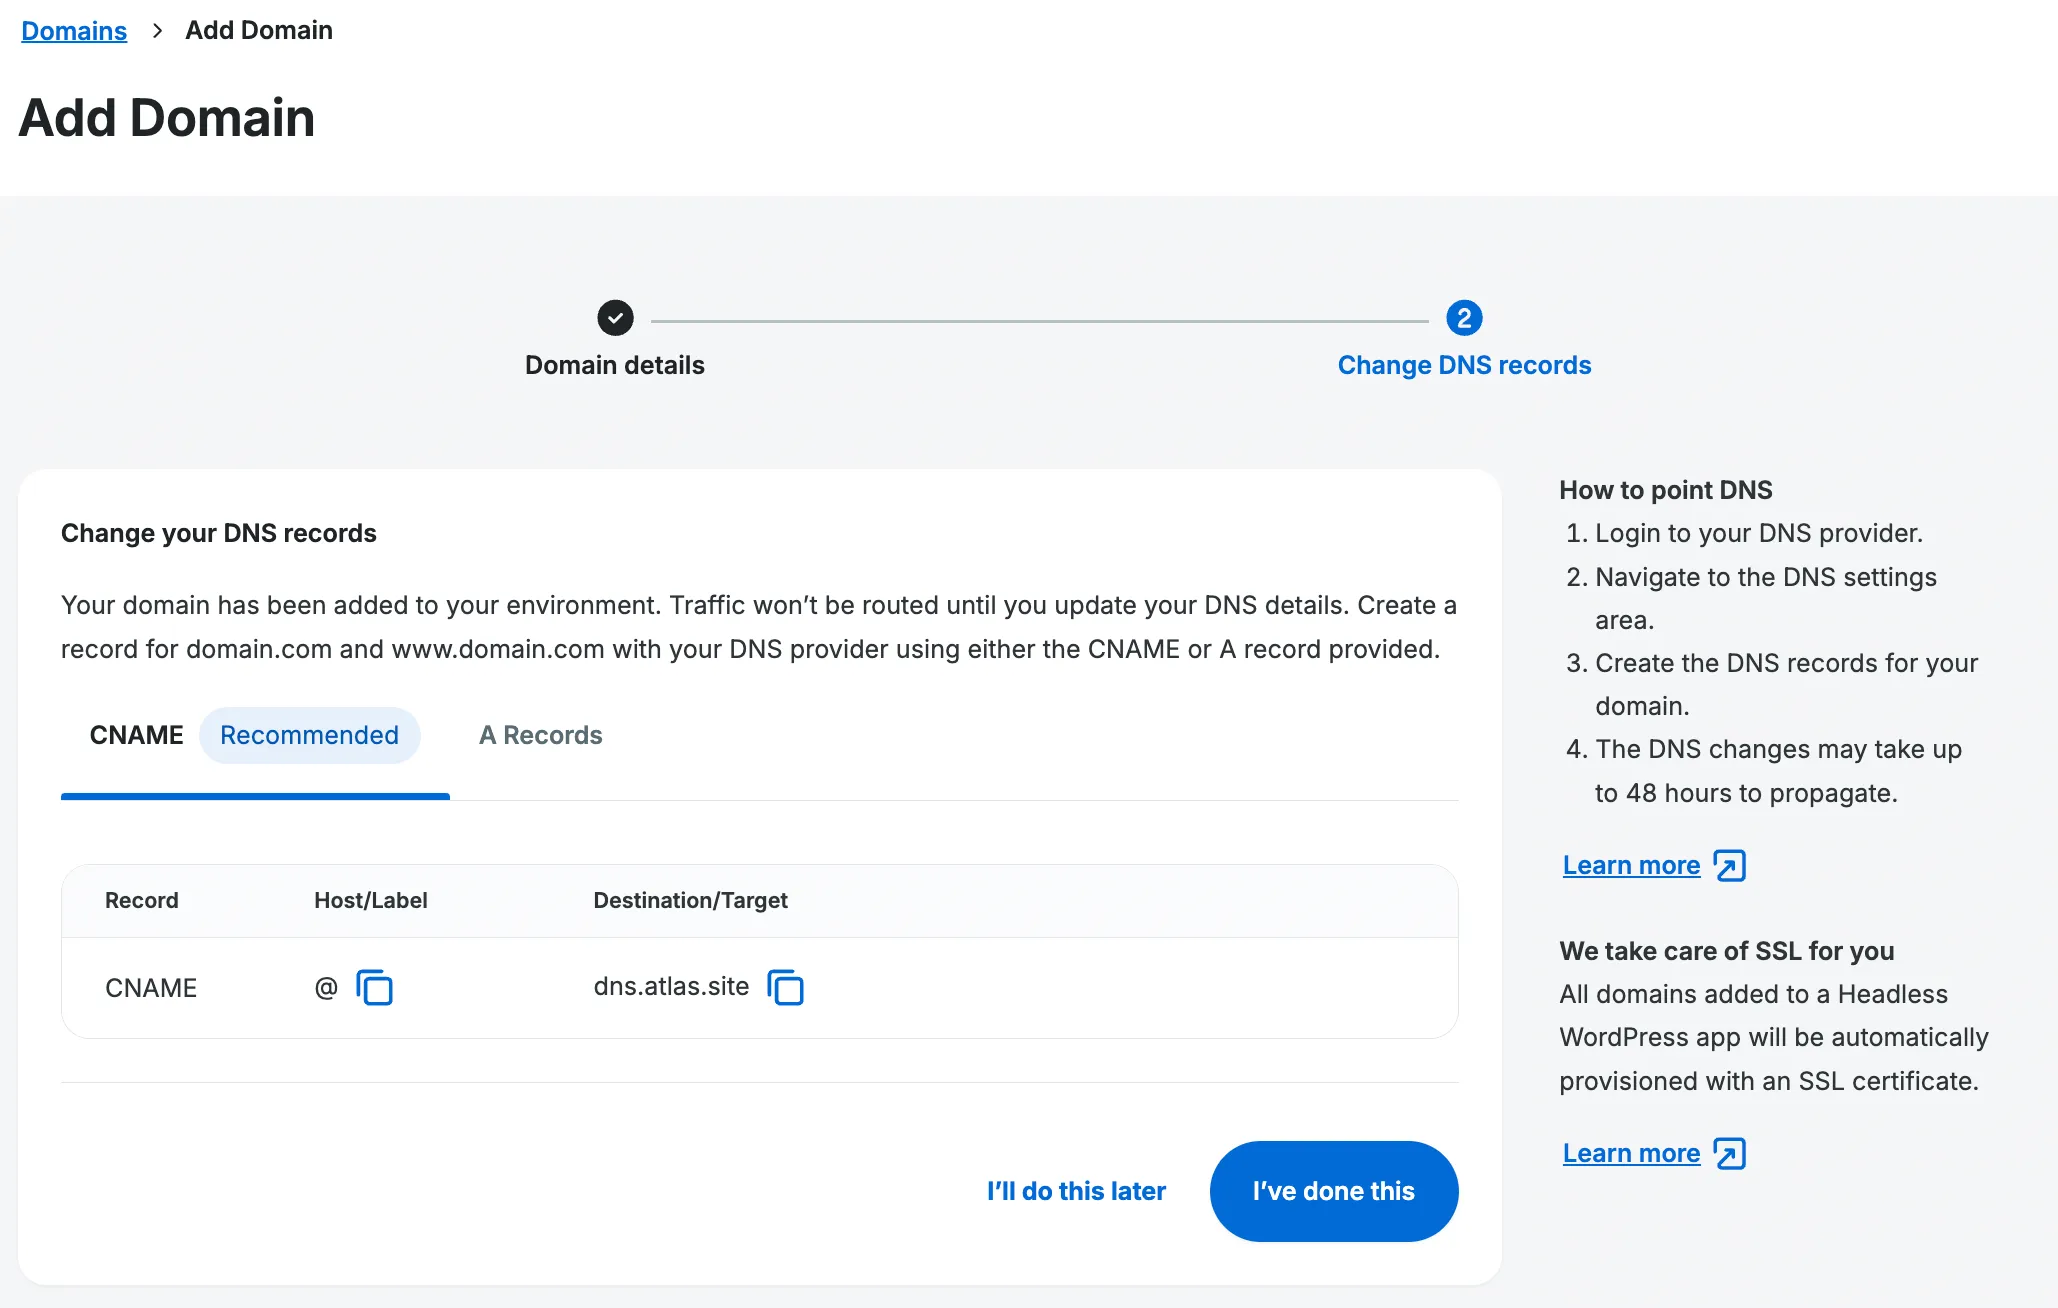
This second flow step provides the DNS records needed to finish the connection for both
wwwandnon-wwwURLs to our WP Engine servers. This process will vary based on your particular DNS provider, so be sure to reference their documentation on how to add aCNAMEorArecord.Finally, selecting either of the bottom buttons from this flow step will return you to the environment’s Domains page, but the
I've done thisbutton will also revalidate the domain(s) added.
View and modify existing domains
Section titled “View and modify existing domains”Once you have accessed your environment’s Domains page you may wish to review or modify the details pertaining to the environment’s existing domains.
The default domain and any custom domains will be visible within the domains table (as shown below), each with their own row, containing basic information - like any redirects applied, whether they are the Primary domain, the latest DNS and SSL statuses, and an ellipsis of possible actions available to that domain.
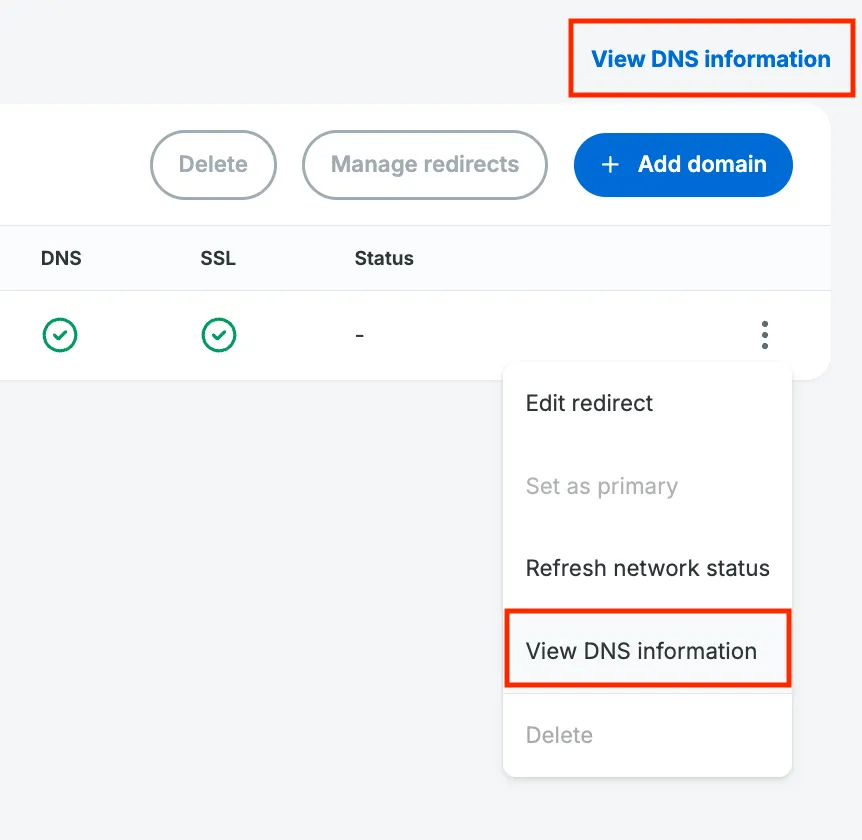
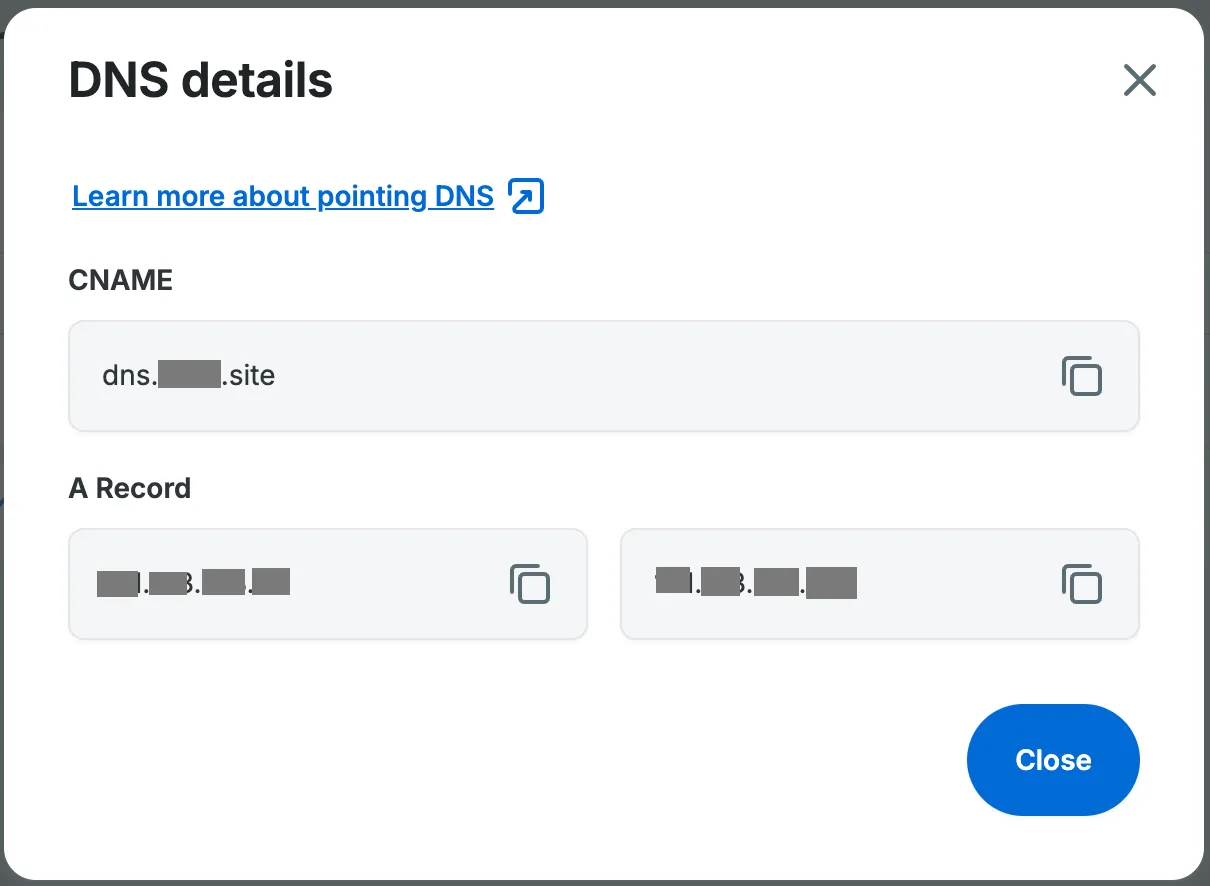
View DNS information
Section titled “View DNS information”The DNS information, for your WP Engine environment’s WordPress backend, can be accessed within the Domains page banner View DNS information button or within any domain row ellipsis menu item, as highlighted below. This will be useful for reference if you want to update one of your custom domain’s DNS records within your DNS provider.
Opening View DNS information should display something like the following.
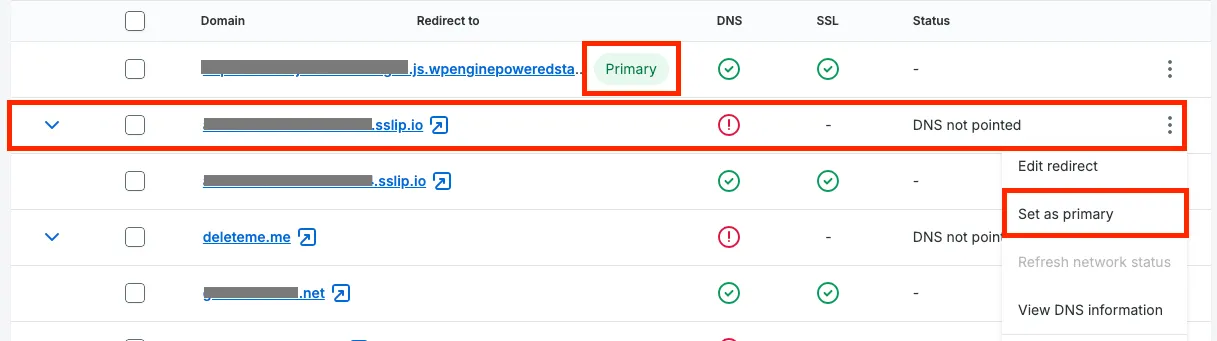
Set a new primary domain
Section titled “Set a new primary domain”This can be done within any domain table row by selecting Set as primary in the ellipsis menu. This does not require a redeploy and takes effect immediately, so when selected you should see the Primary tag displayed on this domain row. Also note that the primary domain must be reassigned before you can delete that domain, as shown in the tooltip below.
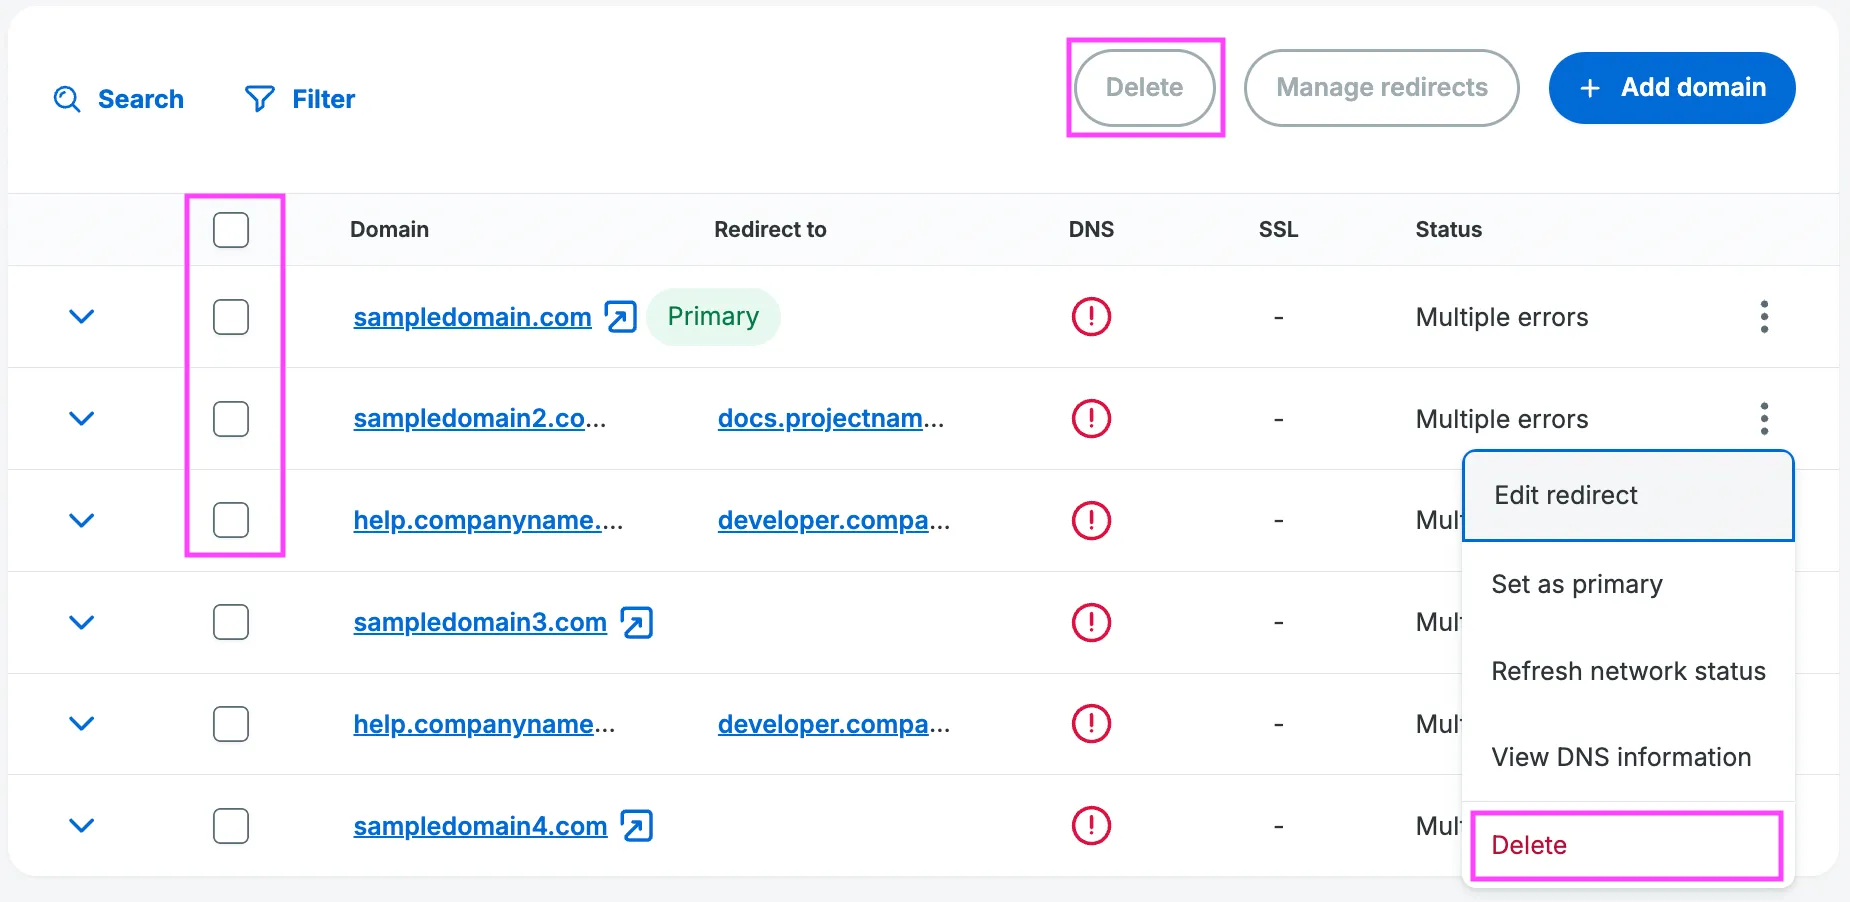
Deleting domain(s)
Section titled “Deleting domain(s)”The deletion of custom domain(s) can be done individually or in bulk. To delete in bulk you select one or more of the domain row’s checkboxes and then click the Delete button (both highlighted below in pink). To delete an aingle domain row, select its Delete ellipsis menu item (highlighted below in red).
Both deletion approaches take you to the following confirmation modal, where you will confirm the custom domain deletion(s).
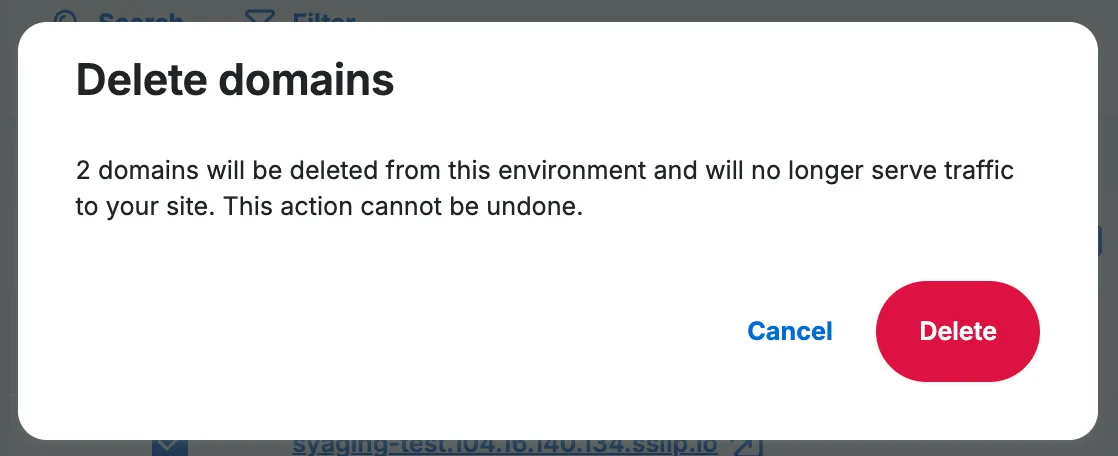
Note: you cannot delete the default domain (created with environment), the Primary domain or any domain currently redirected to by another domain.
Setting domain redirect(s)
Section titled “Setting domain redirect(s)”Domain redirects can also be done individually or in bulk. To redirect in bulk you select one or more of the domain row’s checkboxes and then click the Manage redirects button (both highlighted below in blue). To add a redirect to a single domain, select its Edit redirect ellipsis menu item (highlighted below in red).
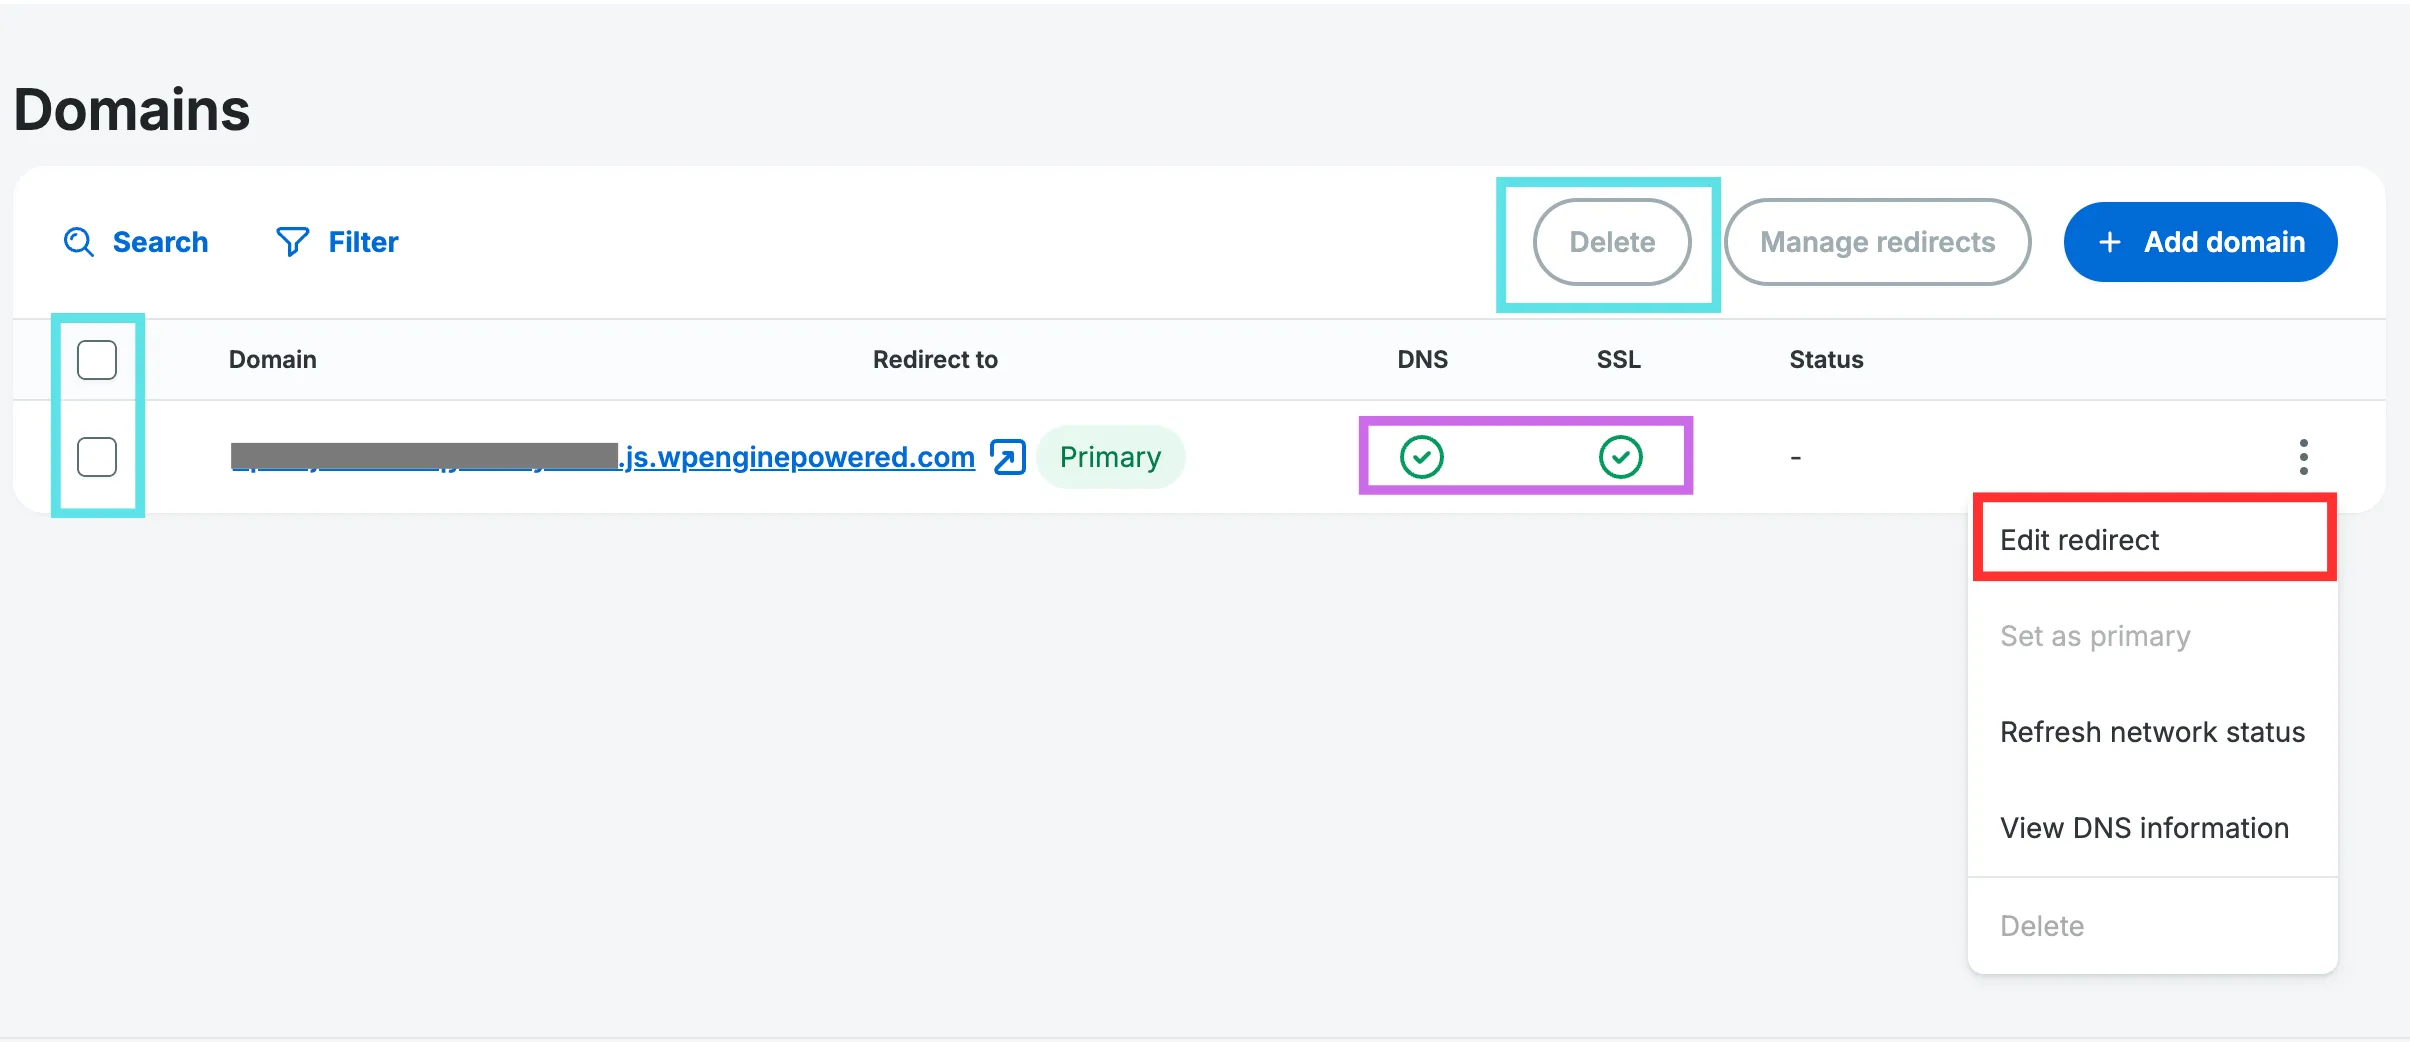
Note: a destination domain must already exist and be valid, where both DNS & SSL statuses are both successful (highlighted above in purple). Redirects also can not be circular (eg. A -> B and B -> A).
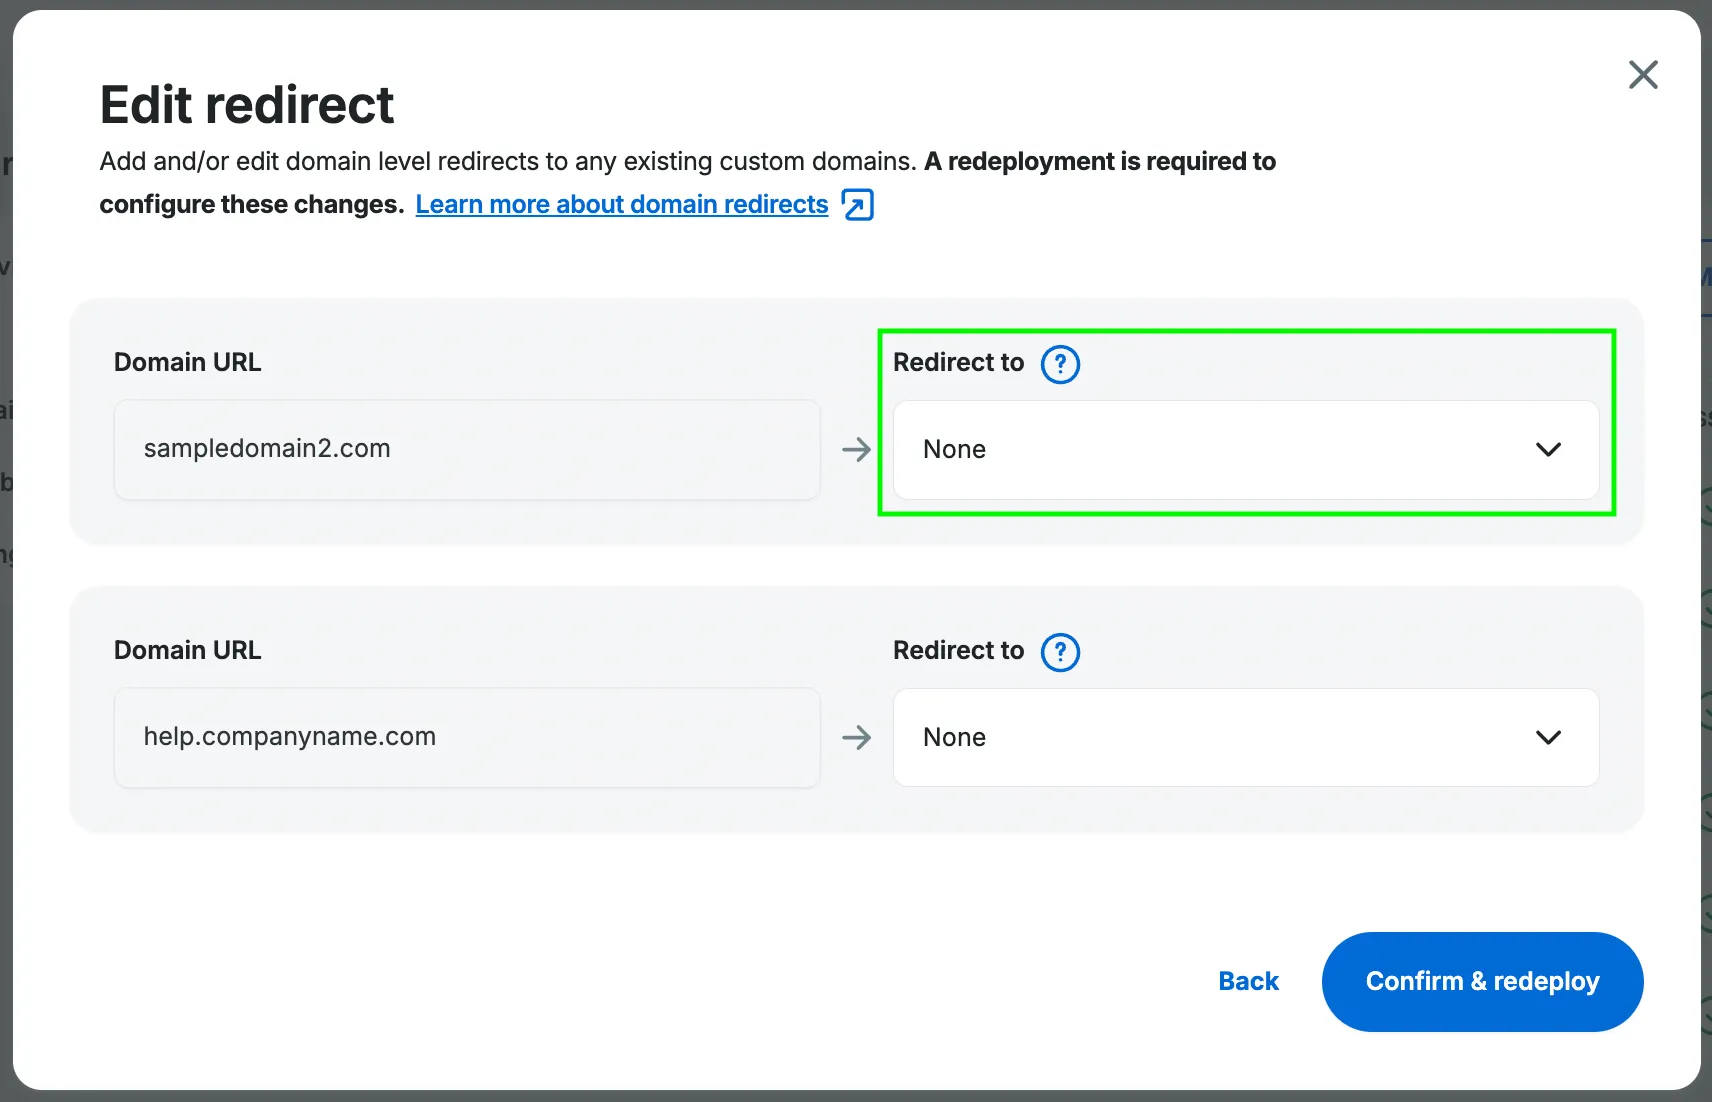
Both redirect approaches take you to the following confirmation modal, where each domain will have a row to represent it. To specify a domain redirect rule, choose a domain row and select a destination domain for the redirect (from right-hand dropdown Redirect to - highlighted below in green).
When you have finished specifying the desired domain redirects, click the Confirm and redeploy button for changes to be applied and for your app to redeploy. Your redirect rules will work as expected only if both your target and destination domains are properly configured (including the DNS details).
Once confirmed, you can inspect your rules in the Redirect to column, as shown in the third domain row below.

Note: At the moment it is not possible to define redirect rules through the Headless Platform CLI. If changes done through CLI are expected to conflict with redirect rules set in the User Portal, this operation will be stopped and changes requested through CLI will not take place.
Troubleshooting
Section titled “Troubleshooting”Before trying any of the below suggestions please note that DNS can be inherently difficult to troubleshoot. Depending on your provider and your TTL (Time To Live) settings, it could take up to 24 hours for changes to your DNS records to propagate across the web. When in doubt, waiting an appropriate length of time can be a better troubleshooting step than making lots of changes very quickly.
Domain statuses and resolving errors
Section titled “Domain statuses and resolving errors”Once you have accessed your environment’s Domains page, either before or after some of the possible updates discussed above, you may wish to review and understand the status of your environment’s current domains (default and custom), as they are presented in the domains table.
There are three columns in a domain row which address the domain’s status: the DNS provider to WP Engine server status, the WP Engine SSL certificate provisioning status, and the Status message column - which displays any error messages from the previous two status columns.
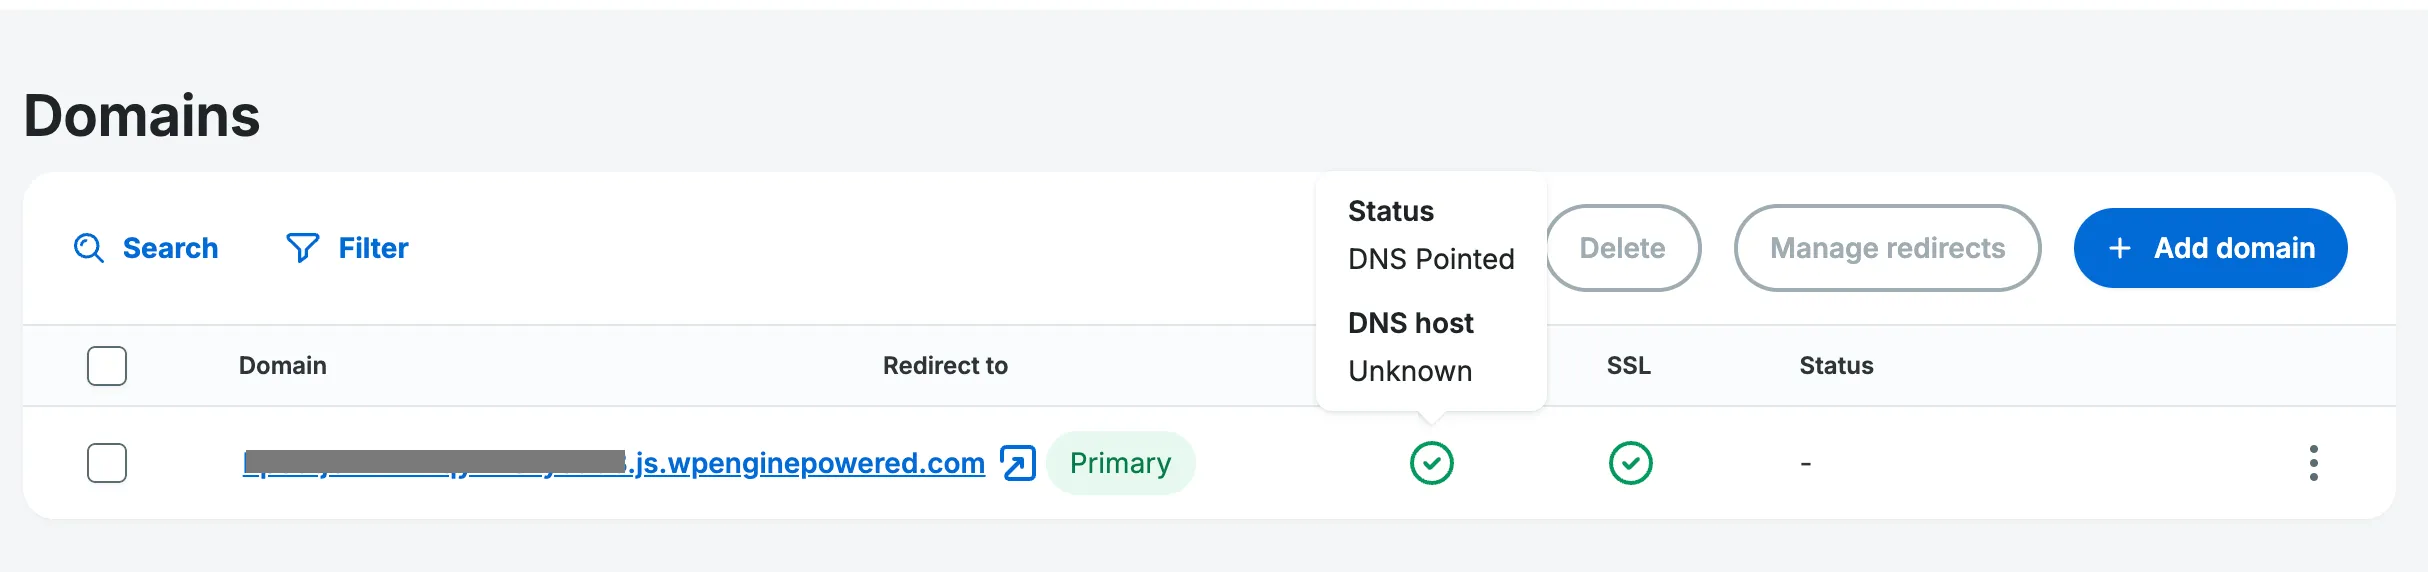
The DNS status check happens first and can be Pending (blue clock icon), Pointed (green check mark icon), or Not pointed (red exclamation icon; shown below).

The SSL status check happens after the DNS check is successful, and can be Pending (blue clock icon), Enabled (green check mark icon), or Error (red error strikethrough icon; shown below).
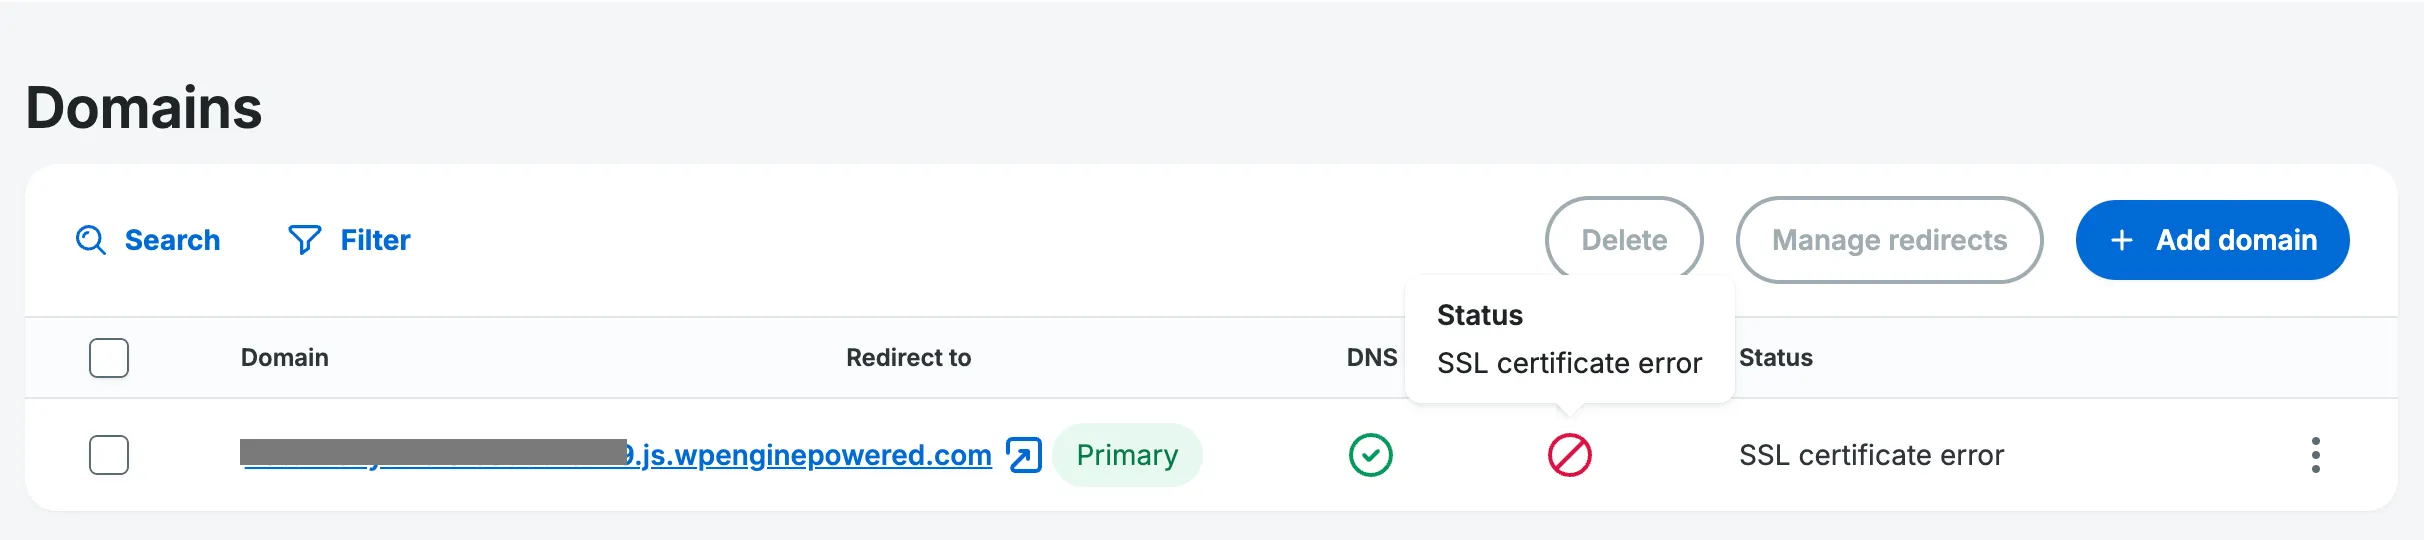
If you wish to review more information on either domain’s status, you can hover over the status icon to reveal a tooltip (DNS tooltip shown below on domain with a successful status).
If you see an error within either of these two statuses of a domain row you will also see that the row in question row can now be expanded. Expanding the row will present you with more information and steps to hopefully rectify the issue.
Below is an example of an expanded domain row where the DNS status has failed (Not pointed), and the SSL status is waiting (Pending). Both statuses can be refreshed, while the Change DNS details button provides you with a link to the Add domain flow step 2, mentioned earlier.
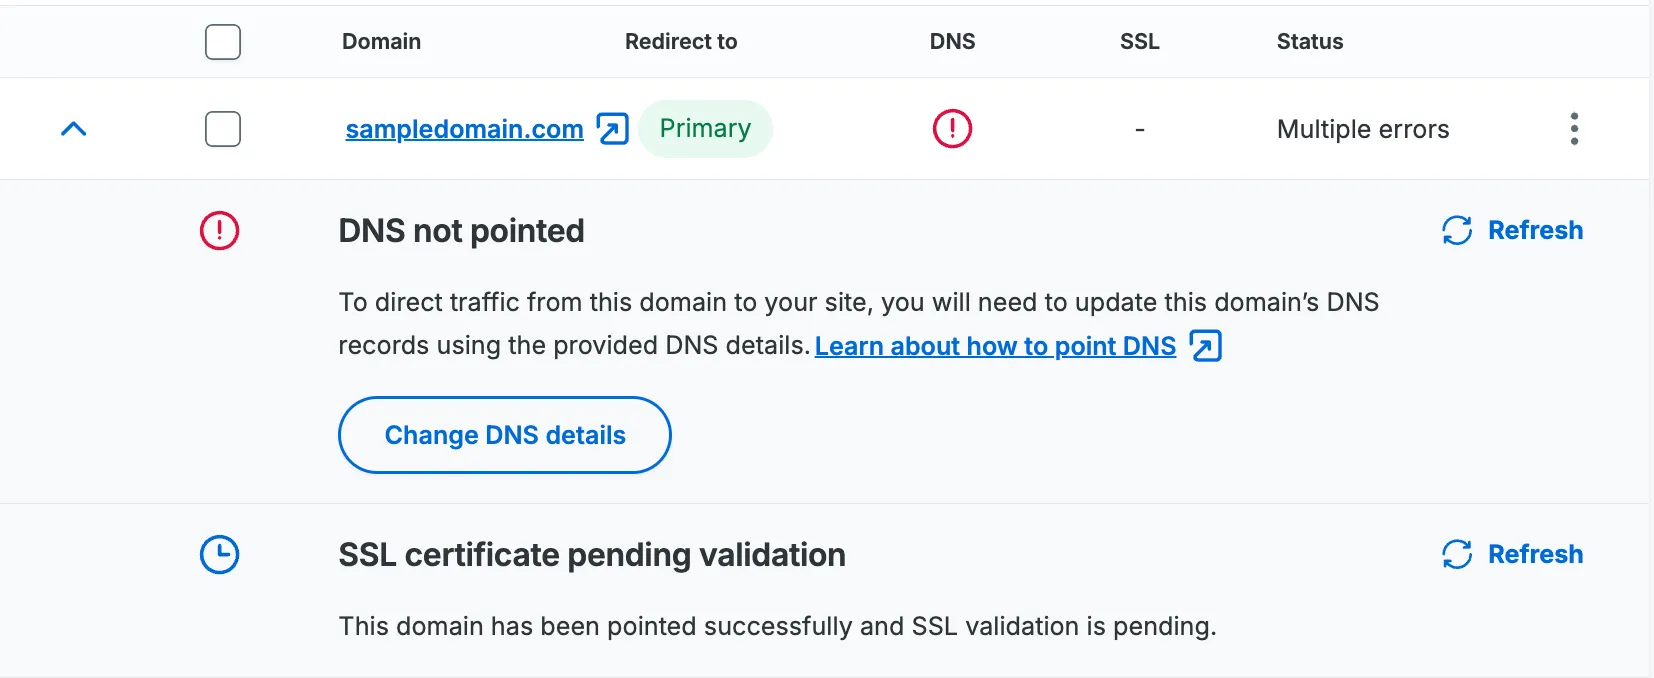
Note: If your domain name resolves but shows either a Cloudflare error or an error regarding SSL versions, it’s possible that the platform is still provisioning the resources required to support your custom domain name. If either of these errors persist, please reach out to support.
Using a custom domain for the WordPress backend
Section titled “Using a custom domain for the WordPress backend”As you prepare your site for production, it is strongly recommended that you assign a custom domain to the WordPress backend site by following WP Engine’s Add domain in User Portal guide.
Without a custom domain name enabled, WP Engine will apply strict settings in your site’s robots.txt file to protect it during development that may not be desireable for production sites.
Customizing robots.txt
Section titled “Customizing robots.txt”Assigning a custom domain provides you with the ability to customize the WordPress site’s robots.txt file to allow access to some of the site’s assets. For example, a meta tag like the one below, which specifies a social image for a post, may not load correctly in Twitter or other social services using the default robots.txt configuration applied to sites with the default domains your-cms.wpenginepowered.com or your-cms.wpengine.com:
<meta property="og:image" content="https://you-cms.wpenginepowered.com/wp-content/uploads/2023/01/site-image.jpg"/>Creating a custom robots.txt file allows you to define rules specific to your headless implementation. If you want to learn more about using robots.txt or ways to create a custom file on the WP Engine platform, you can reference this guide on robots.txt for more details.
Domain naming suggestions
Section titled “Domain naming suggestions”Choosing good domain names for the parts of your application is important to its overall organization. While there is no “correct” choice, there are successful patterns you can emulate.
Using distinct root-level domains for your frontend and backend such as frontend-js-app.com and backend-wp-site.com is one option.
Another common pattern is to use a root-level domain for the frontend JS app, and a subdomain that points to the WordPress environment, such as:
example.com-> frontend JS appapi.example.com-> backend WP site
Additional Resources
Section titled “Additional Resources”Smart Plugin Manager Compatibility